


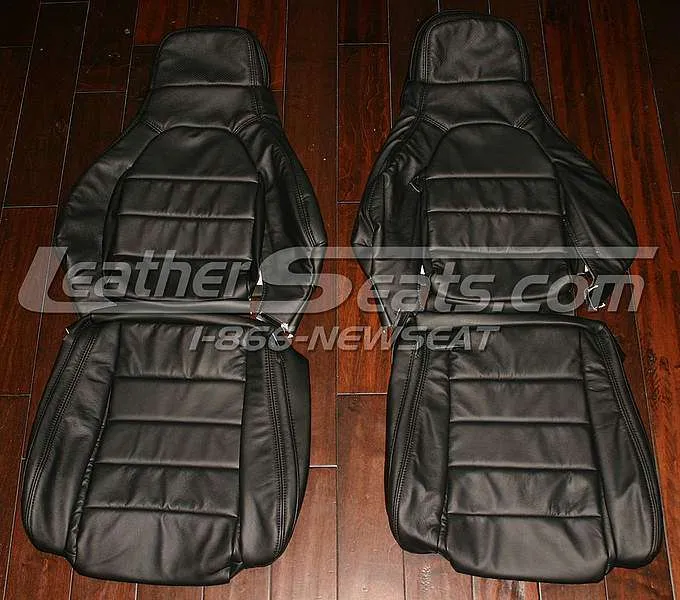
1990-1997 Mazda Miata Replacement Leather Seat Upholstery Installation Guide
It is a good idea to lay out all the tools you will need at the beginning of any installation. For the NA Miata seats, you will need the following:
- Metric Socket Set
- Phillips head Screwdriver
- Hog-Rings and Hog-Ring Pliers
- Tin Snips/Metal Cutters
The Mazda Miata seats are secured by four (4) bolts. These bolts are located at the ends of the seat rails. Move the seat all the way back to reveal the front two bolts. They might be covered by plastic trim pieces. If necessary, remove them using the door panel removal tool or a flat head screwdriver. After the bolts are removed, move the seat all the way forward. You will see two more bolts in the rear. After all four (4) bolts are removed; unplug the battery from the vehicle then tip the seat backwards to check for electrical connections. Unplug the connectors and remove the seat from the vehicle. Make sure to save all bolts, screws, and other parts for reassembly.
Plastic Trim Removal
After removing the seats from your first generation Mazda Miata, you will need to disassembled the seats a little further to fully reupholster them. To do this, you will need to take the plastics off of each side of the seat and remove the bolts that you find underneath. Start with the plastics on the outside of the seat first. To begin, you will need to remove the reclining mechanism’s handle which is just held by pressure; do this by pulling with even constant pressure on the handle until to comes loose. Once the handle is removed you can take a Phillips head screwdriver and remove the two (2) screws you will find holding on the plastic trim pieces (see Figure #1). The lower plastic trim piece behind the handle is then removed by simply sliding it forward off the metal bracket behind it. The upper plastic trim piece is then removed by sliding it up and off the metal bracket behind it. Next, move to the inside plastic trim piece where you will find a single screw holding the plastics in place. Remove that screw and simply slide the plastics up and off its bracket (see Figure #2). With the plastic trim pieces removed, you can now see the bolts that hold the seatback to the cushion. Simply unbolt these and the two sections will now be separated (see Figure #3).
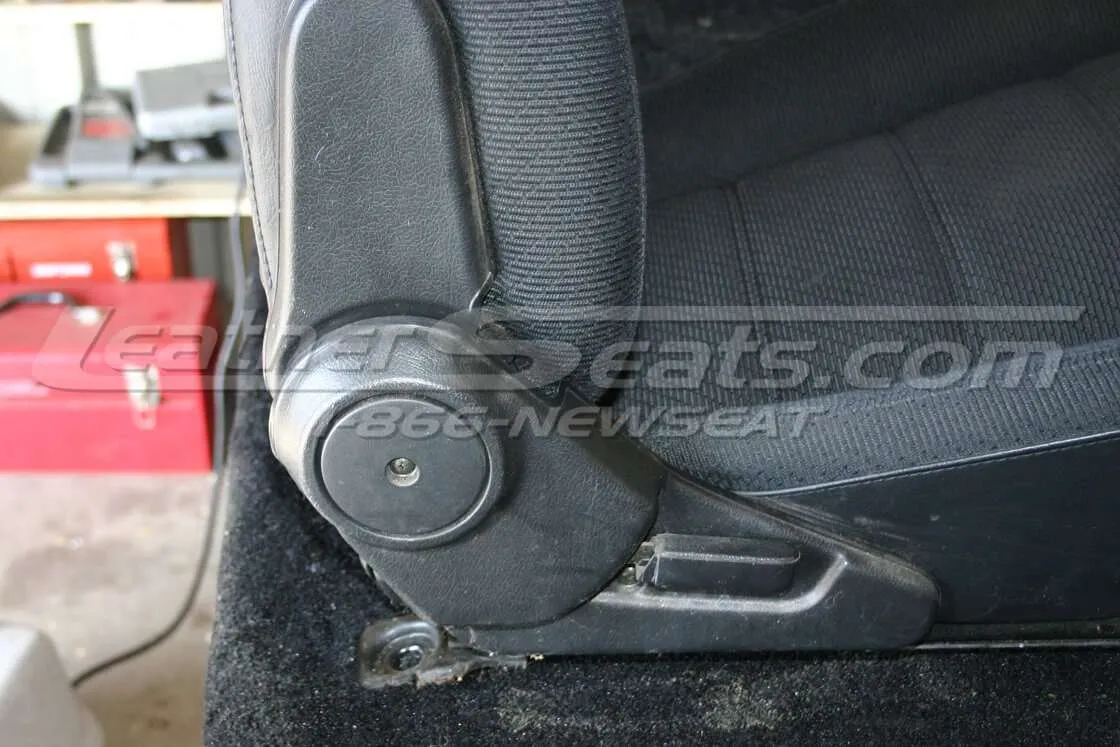
Figure #1
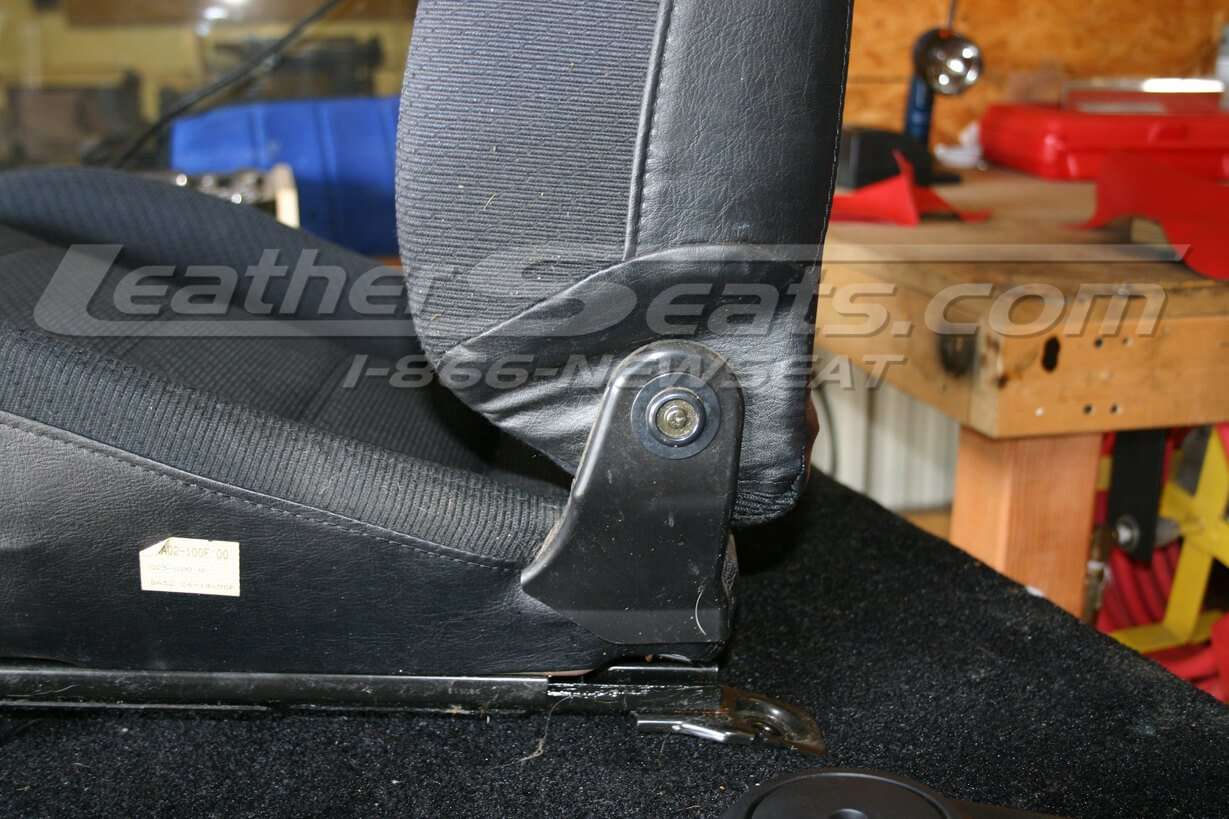
Figure #2

Figure #3
Cushion Installation
After the seatbacks and cushions have been separated, flip the cushion piece over so that the of the cushion is facing you. There are four (4) bolts that hold the frame rails to the seat bottom (see Figure #4). Unbolt and remove the seat frame rails from the seat. With the frame rails removed, you now have access to the hog-rings that hold the upholstery to the seat bucket. There are about fifteen (15) hog-rings around the perimeter of the seat cushion pan that hold the edge of the factory cloth/leather to the seat cushion pan (see Figure #5). Remove these with a pair of tin snips or metal cutters.
Now lift the edges of the factory cloth or leather cover up around the edges of the seat and towards the center of the seat, revealing the insert seam lines. The inserts use about eighteen (18) hog-rings to attach the covers to the foam core. Snip them and remove the cover (see Figure #6). The installation of the Leatherseats.com covers is the reverse of removal. Start with the horizontal hog-ring point that is across the insert, and then move to the edges. After you have recovered the foam core and seat pan, it is a good idea to go ahead and bolt the seat rails back in place before setting the cushion aside and starting on the backrest.

Figure #4

Figure #5
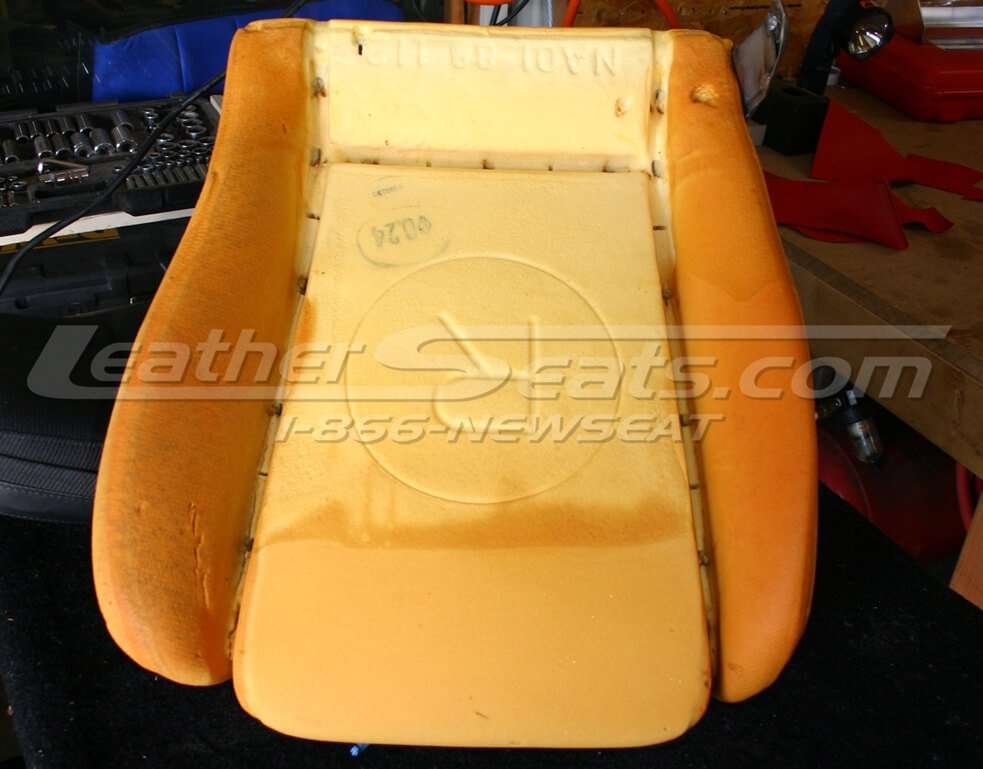
Figure #6
Backrest Installation
Firstly, we will start with the headrest area. There is a seam that is folded over a zipper at the very top of the headrest. Unzip the headrest and then fold the cover down both sides of the headrest (see Figure #7). You will find a hard piece of foam that covers the headrest speakers, which is removable. Remove the foam and pull the cover down where you will find a set of three (3) hog-rings. Clip these three hog-rings and then leave the headrest area alone for the time being (see Figure #8).
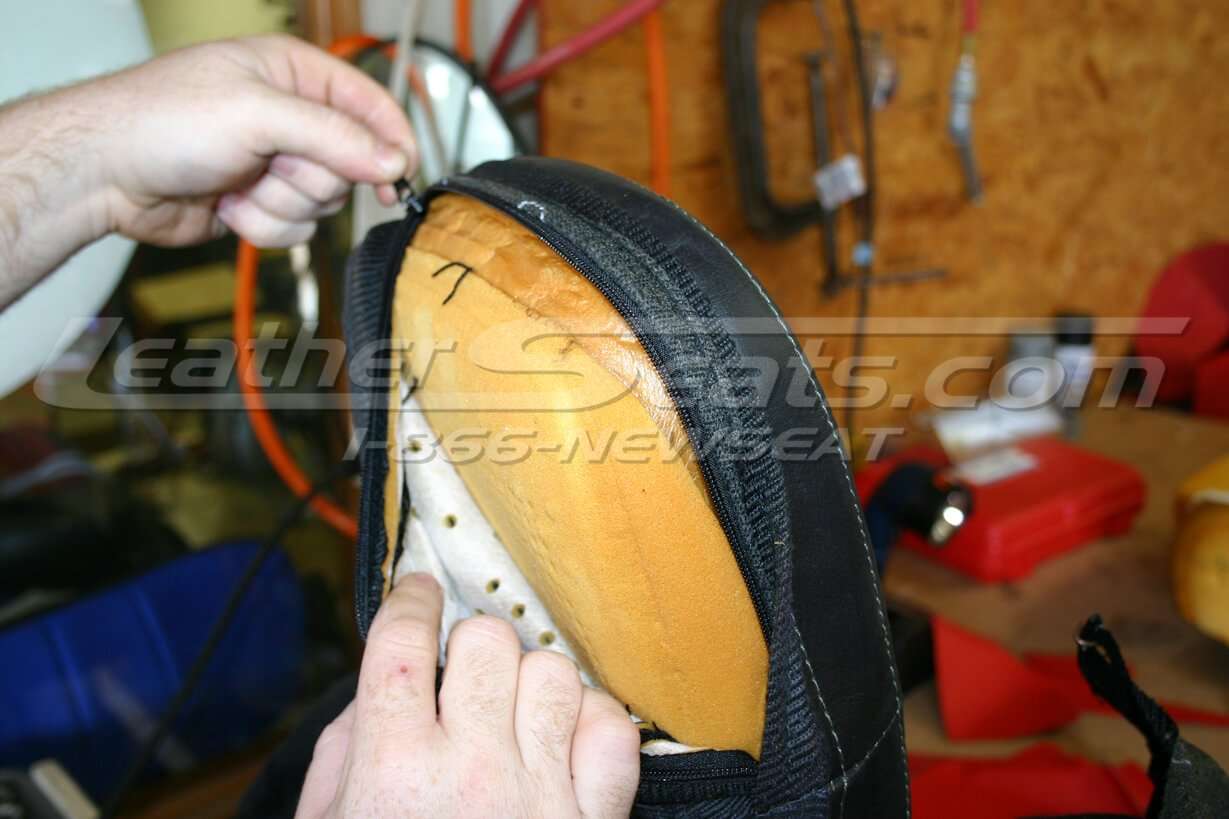
Figure #7

Figure #8

Figure #9
Now flip the backrest so that the bottom edge that was touching the cushion is exposed and you will see the three (3) hog-rings that pinch the back and front of the cover closed (see Figure #9). Remove these hog-rings and the insert section of the backrest should be freed at the bottom. Slowly lift the insert section up looking for any hog-rings that are keeping it attached. Once the insert section is inverted and flipped so that the back is exposed you should see about six (6) hog-rings which hold the cover to the insert foam. Clip these hog-rings and any others you might find holding the insert foam to the cover. Once this is done the insert should be completely free (see Figure #10).
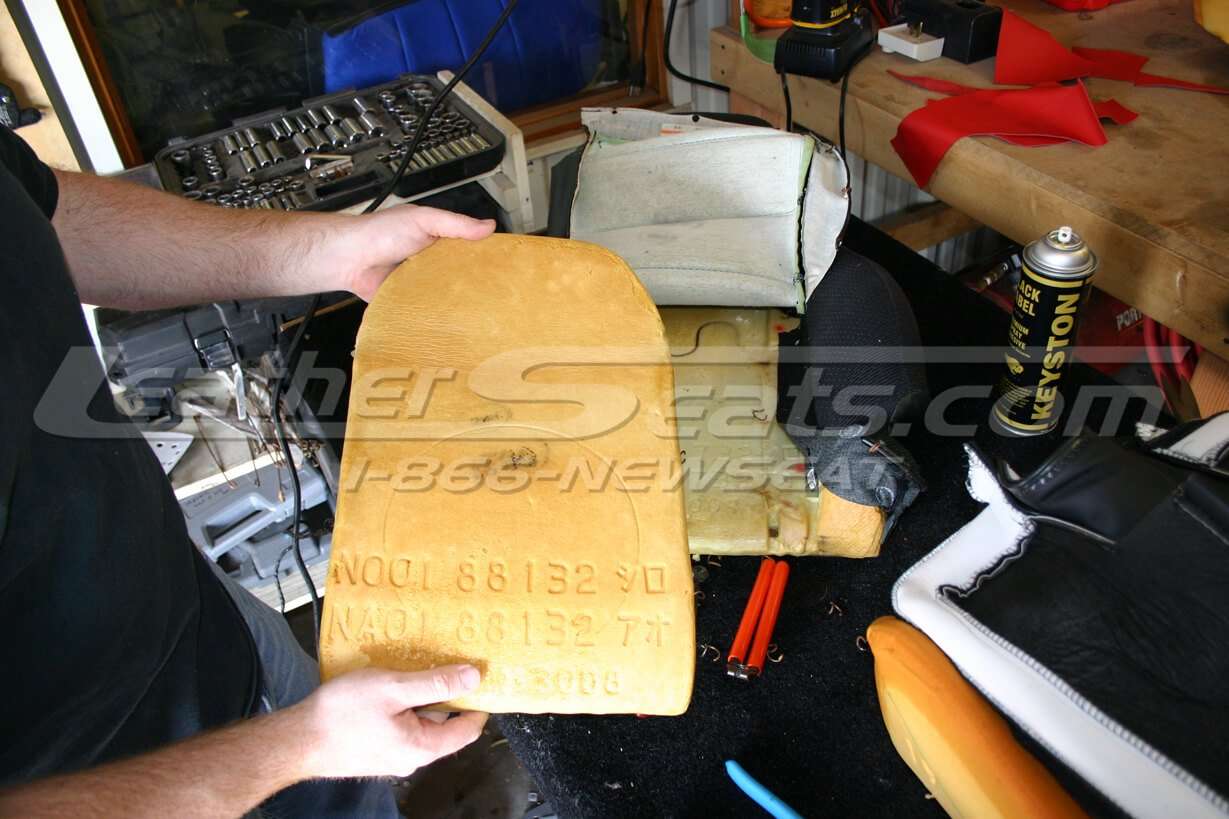
Figure #10
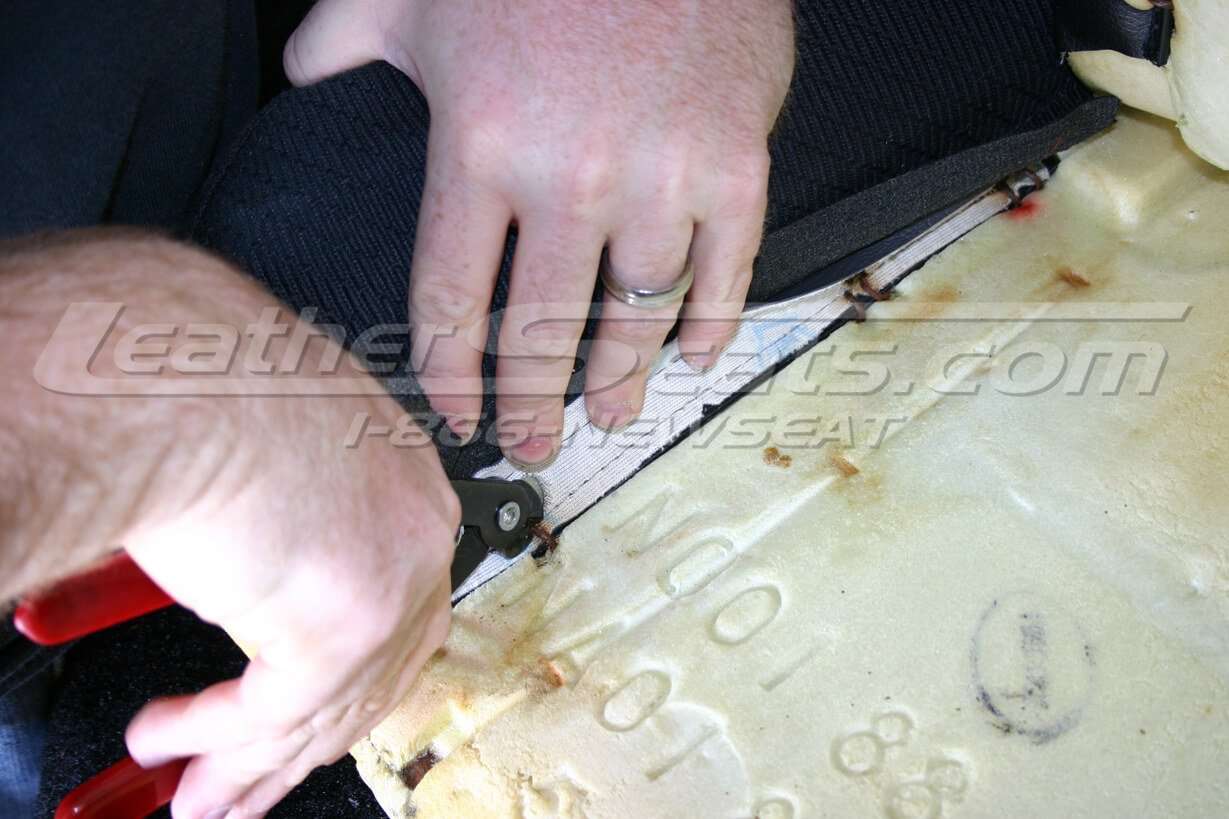
Figure #11
Figure #12
Now that the insert is free you can focus on the rest of the backrest. With the insert gone, you should be able to see a set of hog-rings along the inside of each of the bolsters (see Figure #11). These hog-rings must be cut and you should be free to roll the cover up the backrest until you reach the top of the insert where you will find more hog-rings around the top arc of the insert (see Figure #12). Clip all of these and you should be able to simply slide the cover up and off of the seat. The installation of the Leatherseats.com covers is the reverse of removal. An important note here is that you would do exactly the opposite except that you need to fit the whole cover without hog-ringing the headrest area until the very end when you can unzip and follow the same procedure as before.
Final Notes
The final step in this Mazda Miata install guide is to put everything back into the car. Make sure that you reattach all the wiring harnesses before you plug the battery back in! Be careful when removing/installing the seats from the car that you don’t scrape any plastic, metal, or the door panels with the bottom of the seat, as the seat rails are sharp and will damage any plastic, metal, or vinyl they come in contact with. After the seats are re-installed, it is a good idea to condition the leather and massage any wrinkles that are in the leather. After sitting in the sun for a few weeks, the leather will begin to shrink and will actually form itself to the foam even better, creating a wrinkle free install.


