


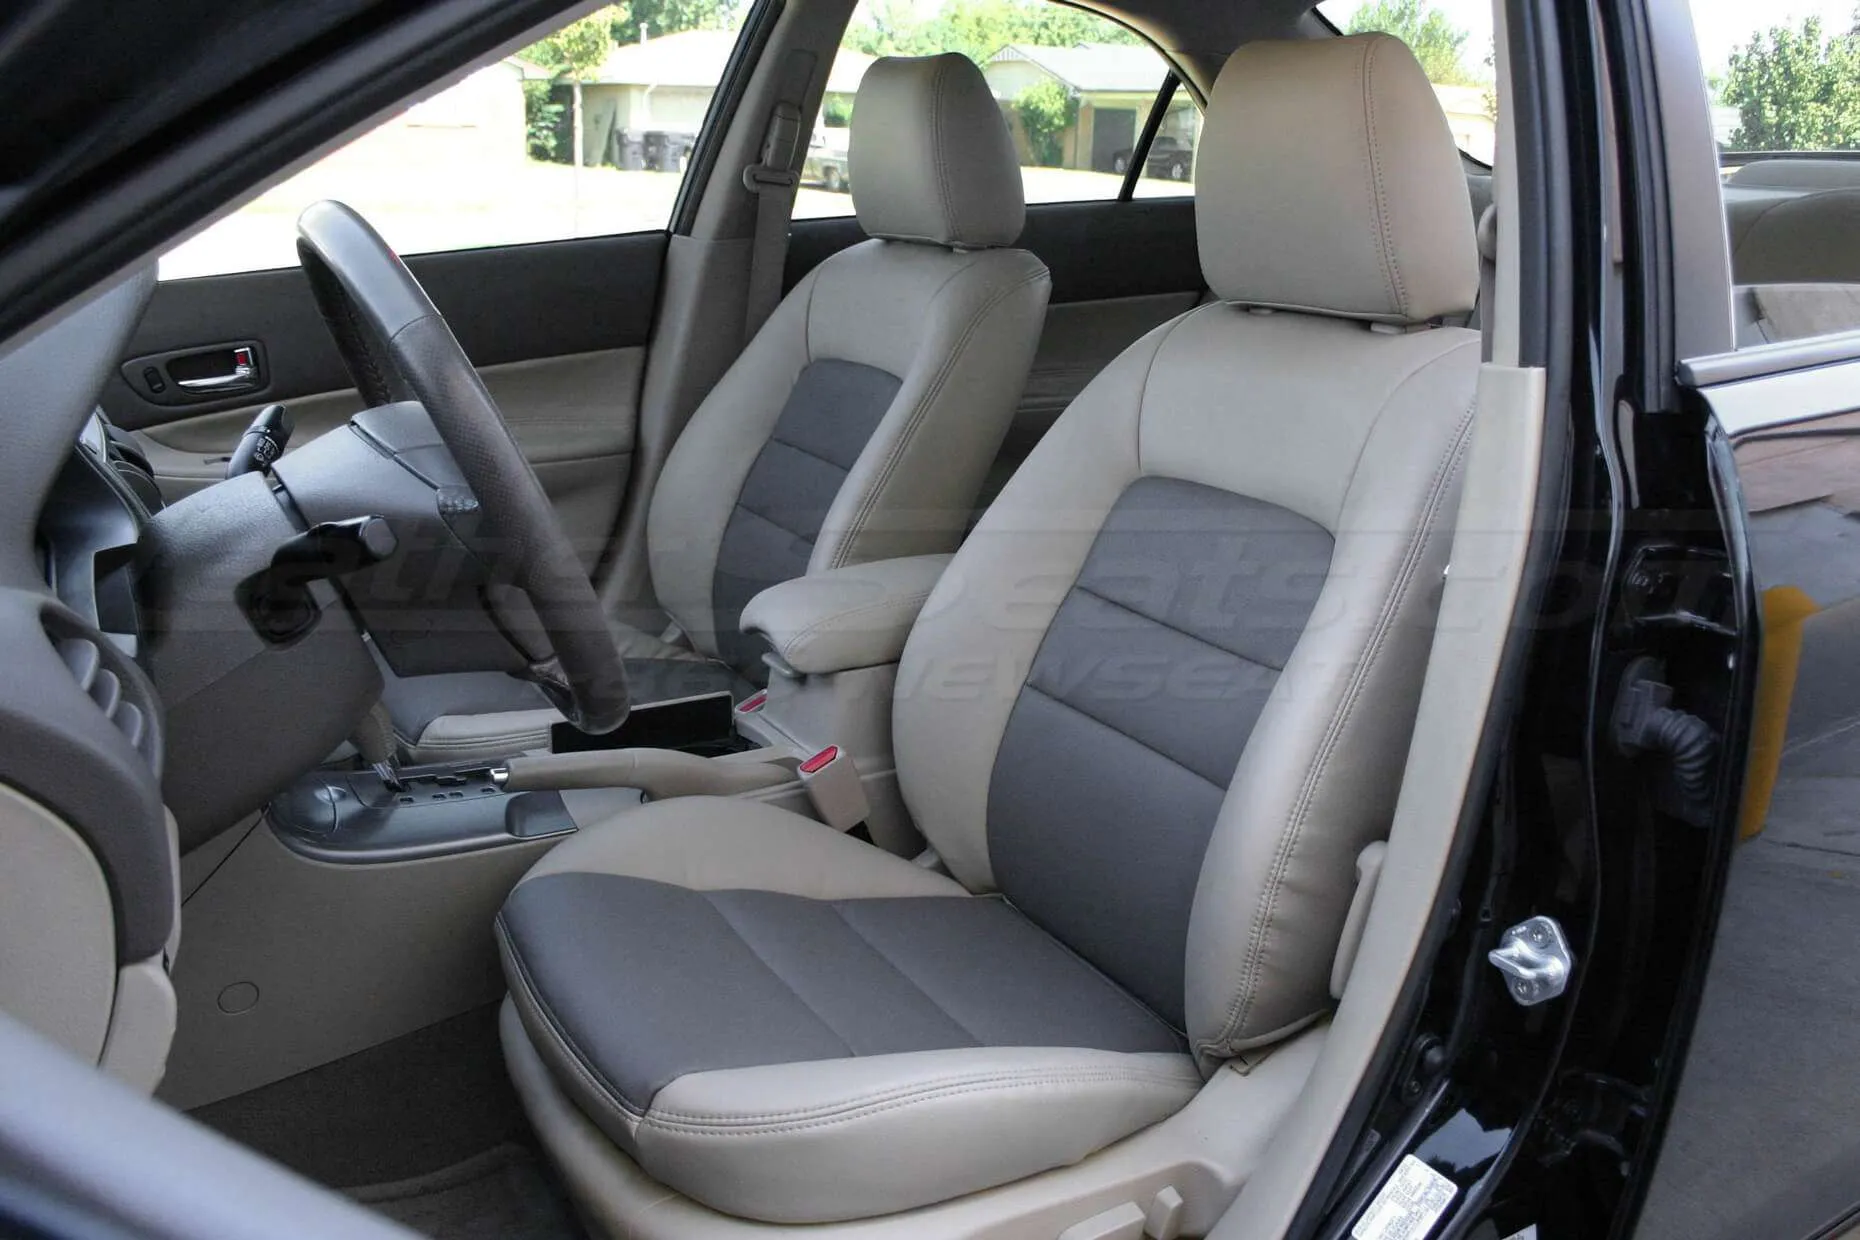
2003-2005 Mazda 6 Replacement Leather Seat Upholstery Installation Guide
It is a good idea to lay out all the tools you will need at the beginning of any installation. For the Mazda 6 upholstery installation, you will need the following:
- Upholstery Glue
- Razor Blade
- Phillips head Screwdriver
- Staple Gun
- 8mm and 10mm Staples
- Hog-Rings and Hog-Ring Pliers
- Tin Snips/Metal Cutters
2004 Mazda 6
Removing the Factory Seats from the Mazda 6
The Mazda 6 front seats are secured by four (4) bolts. These bolts are located at the ends of the seat rails. Move the seat all the way back to reveal the front two bolts. They are covered by plastic trim pieces. After the bolts are removed, move the seat all the way forward. You will see two more bolts covered plastic trim pieces. After all four (4) bolts are removed; unplug your car battery before removing any of the electrical connections to your front seats. Wait about 10 minutes after unplugging the battery then tip the seat backwards to unplug the connectors and remove the seat from the vehicle. Make sure to save all bolts, screws, and other parts for reassembly.
The back seat requires that you remove the cushion (bottom section) first. There are two (2) clips that hold the front of the cushion to the floor (See picture #1). Simply push the lever over on the clip, and pull up on the seat cushion. Once the cushion is removed, the bolts for removing the seat backs are visible. There are eight (8) bolts that hold the bottom of the seat backs to the floor of the vehicle. You will have to flip the seats forward to release the seat and access the back four bolts (See picture #2). The bolsters each have a bolt at the bottom, and a clip on the top. Remove the bolts, and move the levers on the clips to release the bolsters (See picture #3). Make sure to save all bolts, screws, and other parts for reassembly.
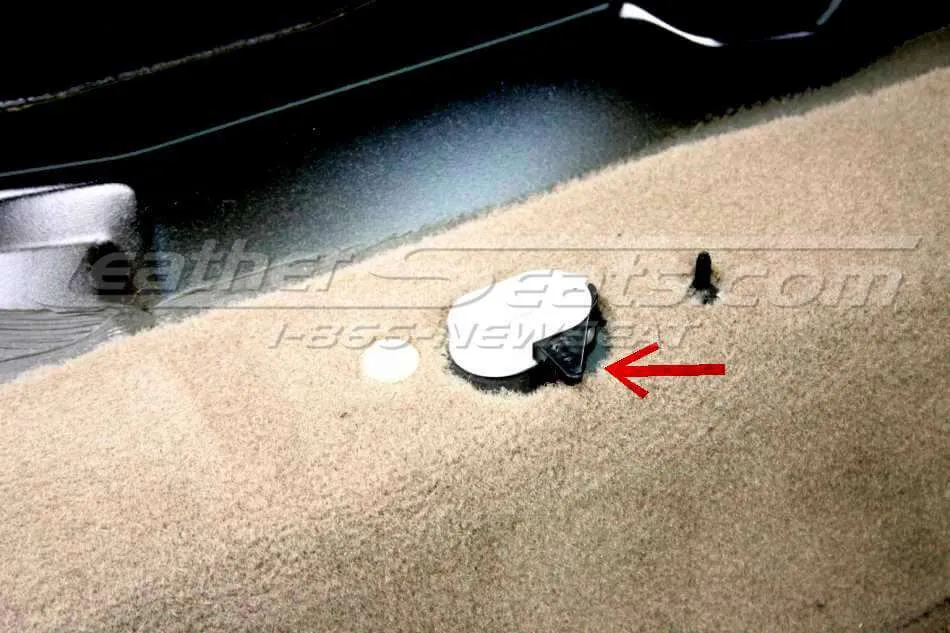
Figure #1
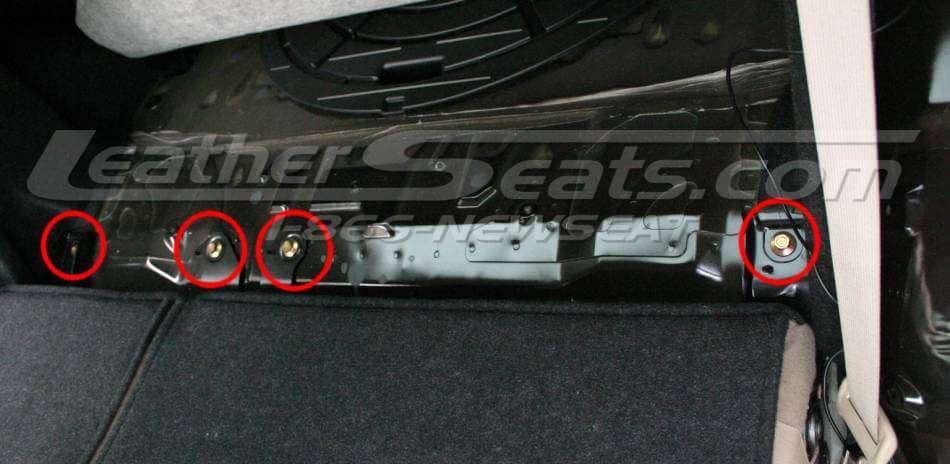
Figure #2

Figure #3
Installing Leather Upholstery on the Front Seats
Cushion: The first step to reupholstering the front seat cushion is to remove the seat cushion pan from the seat frame. Lean the seat backwards so that the bottom of the seat is exposed. There are four (4) bolts that hold the seat cushion pan to the seat frame (See picture #4). Remove these bolts and remove the seat cushion pan from the seat. You will see a series of plastic clips that hold the edge of the factory leather/cloth to the seat cushion pan. Unclip these, and roll the factory cloth/leather up towards the center of the seat, revealing the insert seam lines. Located within the seam lines are hog-rings, which attach the covers to the foam core (See picture #5). Snip the hog-rings and remove the cover. The installation of the Leatherseats.com covers is the reverse of removal. So begin by rolling the cover inside out. Reattach all the hog-rings in the same locations as the factory. It is a good idea to check as you hog-ring each location to make sure you are not hog-ringing a portion too tight and creating wrinkles. You can check your hog-ring work by rolling the cover back to mimic the factory fitment and see if you have any obvious wrinkling. Do not worry too much about minor wrinkles because they will work themselves out after some use and heat. After the hog-rings are all attached, roll the cover over the edges, checking to make sure your hog-ring attachments look good and there is not major wrinkling. Reattach all the plastic clips around the perimeter of the seat pan and then set it aside and start on the backrest.
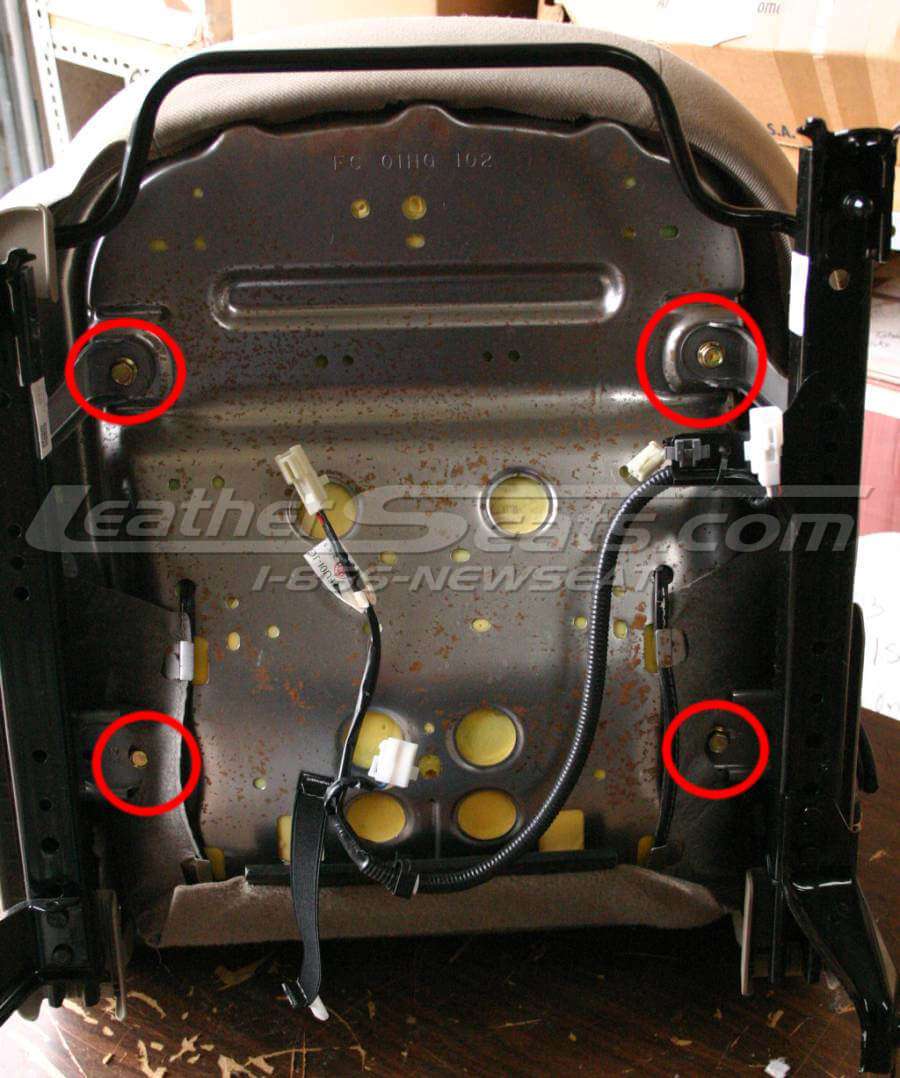
Figure 4
Backrest: First, remove the headrest and set it aside. Then, remove the lumbar knob on the driver’s seat. It is held in by an e-clip. The Mazda 6 has closed-back seats. Unhook the J-clip and the bottom of the cushion (See picture #6). There will be one hog-ring and one plastic J-clip on each side of the seat. Snip these hog-rings and unhook the J-clip, and start rolling the cover up over the seat. As you roll the cover up, you will see hog-rings at each of the seams (See picture #7). Remove the hog-rings as you roll the cover up over the seat.
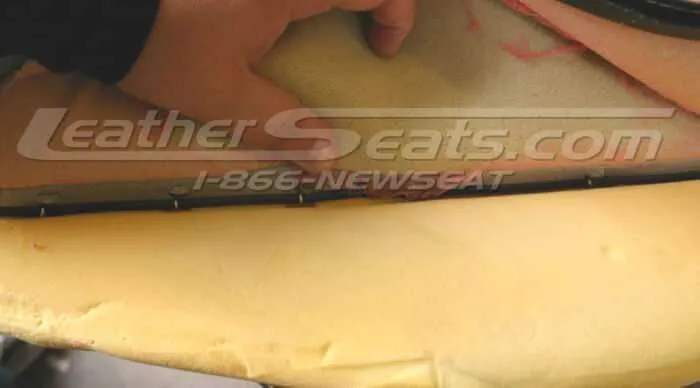
Figure #5
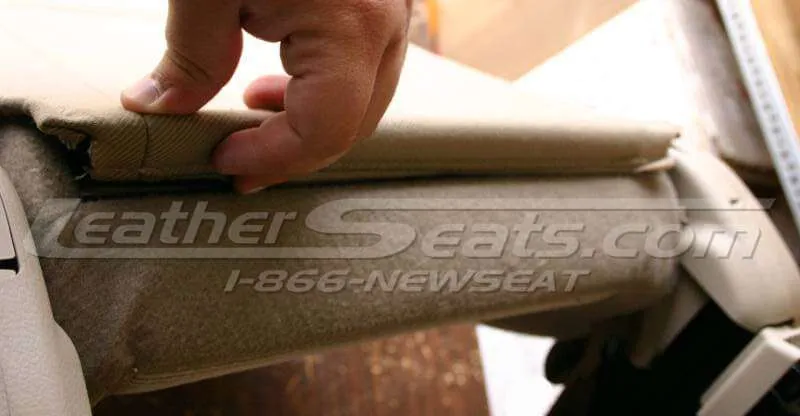
Figure #6

Figure #7
Reinstallation: The installation of the Leatherseats.com covers is the reverse of removal. You may have to transfer the listing wires over to the Leatherseats.com covers. Start with the cover inside out, and align the seams with the edges of the foam (See picture #8). Start to roll the cover down, and attach the hog-rings as you come to them. After you reach the bottom, reattach all of the plastic clips, and hook the J-hooks together. Reinstall the recovered seat cushion and pan assembly (from above). Next, you will need to cut holes for the headrest posts. Feel where the post holes are, and then cut a small “plus” with the razor blade. Make the holes just big enough that you can put one side of the headrest post through, and then work it over the other side.
Backseat Upholstery Installation for Mazda 6
Cushion: Start with the cushion upside down, and work your way around the cushion sniping hog-rings, there are several of them. After you have removed all the attachments around the perimeter of the cushion, fold the cushion up to reveal the inserts. Snip the hog-rings for the inserts, and remove the cover. Be patient, as there is a ridiculous amount of hog-rings in the seat cushion. Installation is the reverse of removal. It is best to start with the Leatherseats.com cover inside-out and hog-ring the inserts first. When you get to the edges, fold the cover over the foam. Then, hog-ring the perimeter of the cushion where the factory attachment points are and you’re finished!
Backrest 40% Section: First, unhook the J-clip at the bottom of the carpet. Then, pop the plastic clips that hold the carpeted back to the seat. Remove the plastic trim where the seatbacks latch to the car (See picture #9). Fold the carpet forward, revealing hog-rings around the perimeter of the backside of the seat. Snip the hog-rings and then roll the cover off the foam to reveal the insert hog-rings. Snip these hog-rings and the cover should fall off of the foam. Installation is the reverse of removal. Start with the cover inside-out, and hog-ring the inserts first. Then roll the cover over the corners and hog-ring the perimeter in the factory locations. You will need to make the new holes for the plastic pushpins underneath the carpet. The hole for the latch will need to be cut, as well as the trim piece re-installed. Make sure you cut it no bigger then it has to be.
Backrest 60% Section: The process is the same as the “40” section, but in addition, you have an armrest. To remove the armrest, there are two plastic pushpins, and two nuts (See picture #10). Remove the nuts and the pushpins, and the armrest will be free. You will have to remove the staples from the hard backing, and reinstall it on the new cover. You will also need to remove the hinge assembly from the armrest. There are two bolts that hold the hinge on. Make sure you pay attention to the order of the bushings, or else the armrest will not fold properly. You will also need to remove the cup holders from the armrest. Pry them up from the front, making sure not to break the clips (See picture #11). The factory cloth/leather is held in by a few hog-rings. Remove these and start to roll the cover off of the armrest. The installation of the Leatherseats.com cover is the reverse of removal. You will need to cut the holes for the cup holder after the cover is installed. Again, make sure that you do not cut the holes too big! You will also have to staple or glue the cover to the hard backing. We used 8mm staples.
Backrest Bolsters: The bolsters are very easy! The covers are held on by staples and a plastic clip. Just remove the staples and unhook the clip, and the cover is off! The installation is the reverse of removal. Put the cover on inside out, roll the edges over making sure the seam lines line up with the foam, and staple the edges of the covers. We used 10mm staples. The final step is to put everything back into the car. It is generally easier to install the rear seat first.

Figure #8
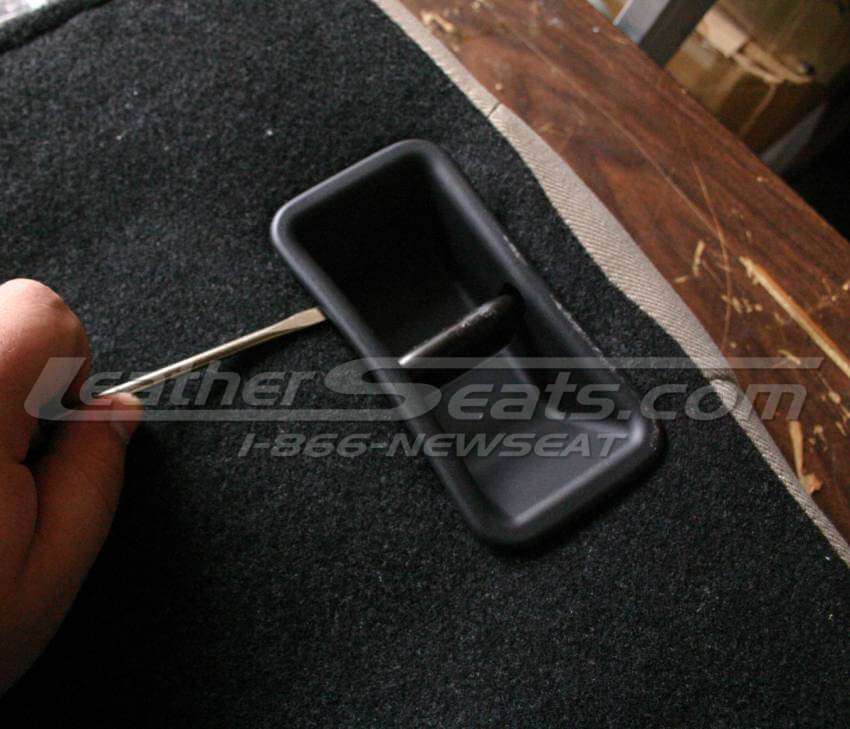
Figure #9

Figure #10

Figure #11
Headrest Upholstery Installation
The Mazda 6 headrests can be difficult if you do not have a buddy and/or a shop vac. If you have factory cloth, your headrests are produced via a foam injected mold method. This means that you will not be able to remove the cloth covers, as they are glued on. It is still a good idea to trim some of the factory cloth away, but you do not have to trim away very much as you want the headrest to fit tightly. To install the Leatherseats.com leather, start with it inside out, and line up the seams to the edges of the foam. Then roll the cover down, and hook the J-hooks. Sounds easy, right? It can actually be very difficult as the headrests fit very tightly. It is a good idea to wrap the headrest in a plastic bag, and using a “shop vac” compress the foam to make it easier to cover the headrest. After you have the headrest cover on, just rip the excess plastic bag off, and hook the J-hooks. The video to the left will help you with the trimming and installation process for this style headrest.
Installing Door Panel Inserts
NOTE: We highly recommend having a professional upholstery shop install the door inserts. They are pretty deep, and it is hard to tuck the edges without breaking the plastic welds. We remove the insert section, and re-plastic weld it back in after it is recovered.
First, you have to remove the door panels from the Mazda 6. There are two screws that hold the door panel to the car. One is behind the inside door handle, the other is in the door pull pocket (See pictures #12 & #13). After these are removed, you have to sternly grasp the door panel, and pop it loose all around the edges of the door. On the front doors, you have to pop the mirror trim piece loose (See picture #14). After you have the door panel loose, disconnect all of the electrical harnesses from the door panel. After the door panel is free from the car, take it to a table to work on. Put it face down on the table, and remove the window switch trim piece. It is held in by several plastic tabs. Start at the back, and push the tabs in just enough to remove the trim piece. You will also have to remove the foam “block” from the door panel. After everything is removed, either cut or grind the plastic welds off flush (See picture #15). Remove the door insert section. If you have factory leather, you will have to sand the leather and clean it with Prep-sol or a similar prep chemical. Set the door insert section face up, and the new material face down. Spray both pieces with the adhesive. Let them sit for about 5 minutes. The glue should feel tacky, and almost dry to the touch. If it is still wet, continue to wait. Fold the new material so that the first part to touch is in the “valley”. Put the material in the “valley”, and then work it to the edges. Set the insert face down, and spray the back edges of the insert and the material. After it has set, fold the edges over. Next, trim the edges so that all of the holes are visible for the plastic “stumps”. You will also need to trim the material for the window switches. Re-install the door insert into the door panel, and begin to plastic weld in the original locations. You can also use small screws, but be sure not to use screws that are too long or else they will poke out the visible side of the door panel. After all of the plastic welds are in place, reinstall the window switch trim. Reinstall the door panel to the car, making sure to plug in all of the correct wiring harnesses.
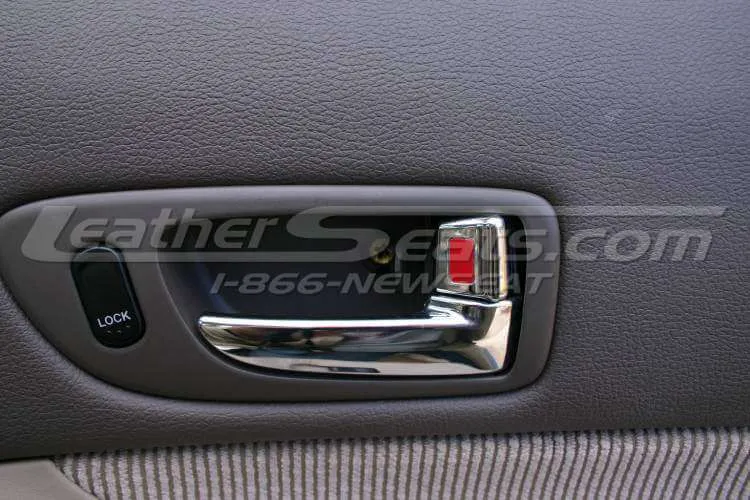
Figure #12
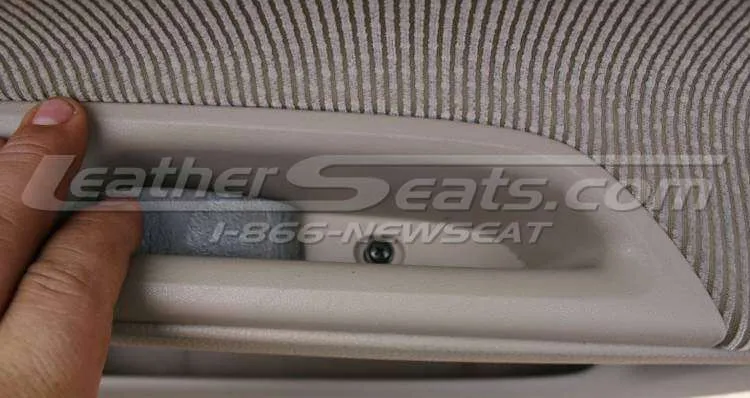
Figure #13
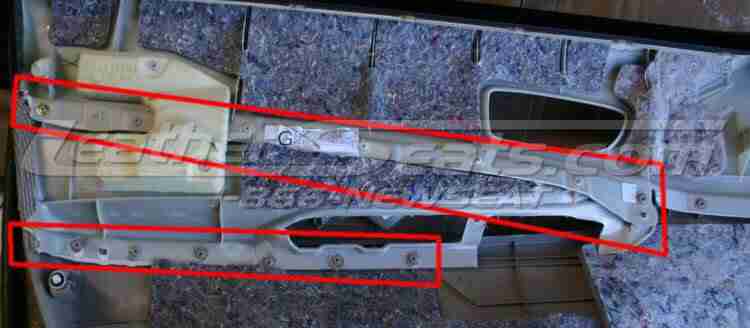
Figure #14
Final Notes
Make sure that you reattach all the wiring harnesses before you plug the battery back into the vehicle! If you plug your battery in while the front seats are unplugged then they might throw a code which may have to be reset by a Mazda dealer. Be careful when removing/installing the seats from the car that you don’t scrape any plastic, metal, or the door panels with the bottom of the seat, as the seat rails are sharp and will damage any plastic, metal, or vinyl they come in contact with. After the seats are re-installed, it is a good idea to condition the leather and massage any wrinkles that are in the leather. After sitting in the sun for a few weeks, the leather will begin to shrink and will actually form itself to the foam even better, creating a wrinkle free install.
