


GM Drop-In Wireless Charging Unit Installation Guide
This drop-in wireless charging upgrade replaces the factory console charging tray with a vehicle-specific charging unit designed to integrate directly into the existing console. The unit installs using factory mounting points and does not require permanent modification or sending your console in for service. Power can be supplied through a hardwired connection or an optional plug-and-play adapter, depending on the vehicle’s factory configuration.
Before You Start
This installation is designed to be straightforward and does not require cutting, drilling, or permanent alteration of the console structure. Review the information below before beginning to ensure you have the proper tools and understand the available power connection options.
Tools Needed:
- T20 Torx driver
- Interior trim prying tool
- Combination pliers
Power Connection Options:
- 12V hardwire adapter – connects to vehicle power and ground wires
- 12V power receptacle adapter – plug-and-play installation option
Typical Installation Time: Approximately 15 minutes Installation time may vary depending on vehicle configuration and wiring method.
Installation Difficulty: Moderate DIY Familiarity with interior trim removal and 12 Volt wire splice connectors is helpful.
Installation Overview
The installation process involves removing the console trim and factory charging tray (if equipped), installing the drop-in charging unit, and connecting power based on the vehicle’s configuration.
Overview:
- Open the console lid and remove the underside trim panel
- Remove the factory charging module and console bezel/tray (if equipped)
- Install the drop-in wireless charging unit using factory mounting points
- Connect power using the appropriate wiring method for your vehicle
- Test charging operation, tuck wiring, and reinstall trim
Step-by-Step Installation
Step 1: Remove the Console Lid Trim
Open the console lid and remove the plastic trim panel on the underside of the lid. Use a flat interior trim tool to carefully release the retaining clips, working around the panel to avoid bending or cracking the trim.

Step 2: Remove Factory Wireless Charging Module (If Equipped)
If your vehicle is equipped with factory wireless charging, remove the four Torx screws securing the wireless charging module to the underside of the console. Unplug the factory charging module and set it aside, as it will not be reused with the drop-in charging unit.
Step 3: Remove the Console Bezel and Charging Tray
Remove the seven Torx screws securing the factory console bezel and charging tray. Lift the bezel and tray out of the console lid.
Step 4: Install the Drop-In Wireless Charging Unit
Install the replacement wireless charging unit into the console tray cavity and ensure the unit is fully depressed into the opening. Secure the unit using the included Torx screws. Do not overtighten the screws, overtightening can warp the bezel and affect fitment.
Step 5: Connect Power
Connect the drop-in wireless charging unit to a power source based on your vehicle’s configuration.
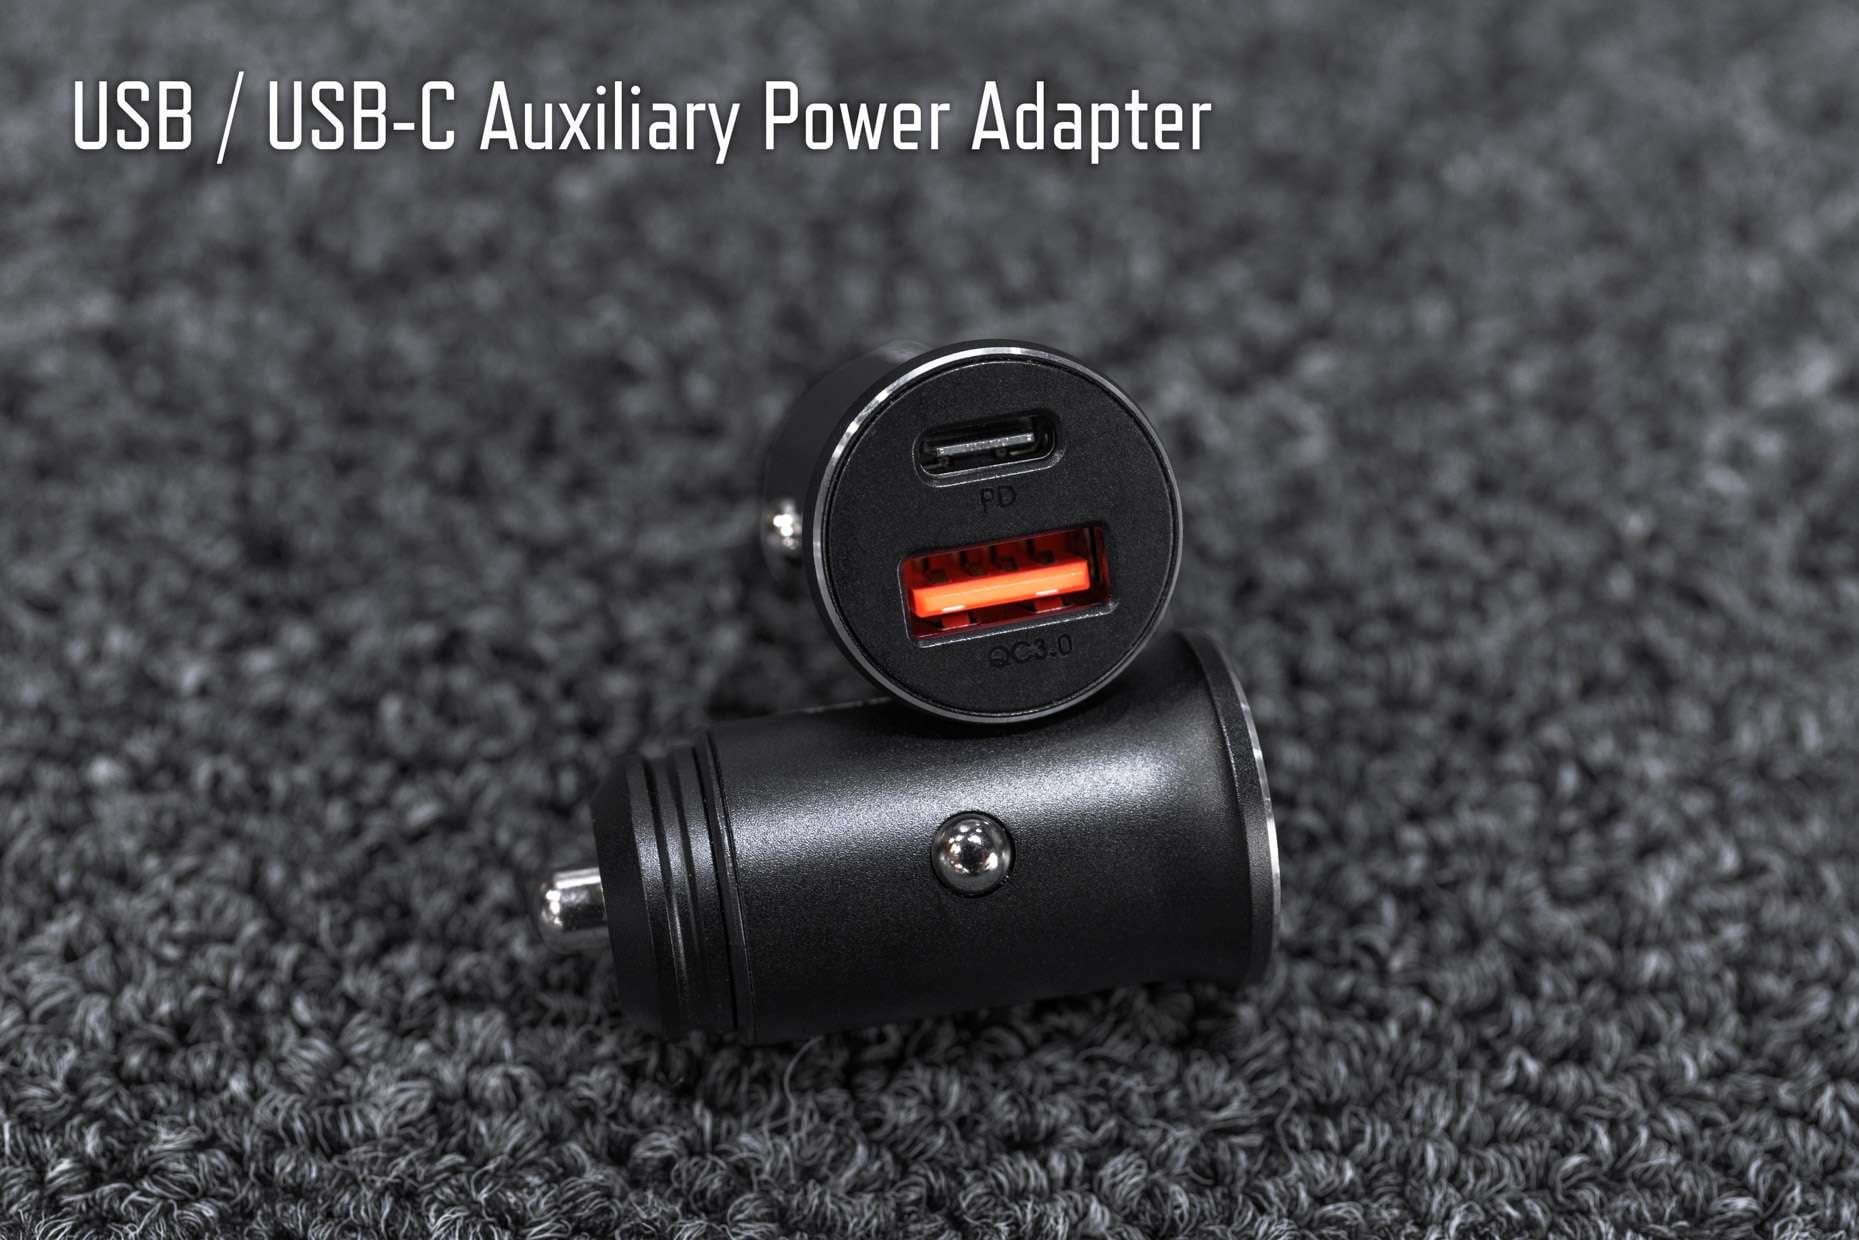
- If you prefer not to tap into vehicle wiring, we can provide an optional plug-and-play 12V USB adapter that connects to the console’s power receptacle.
-
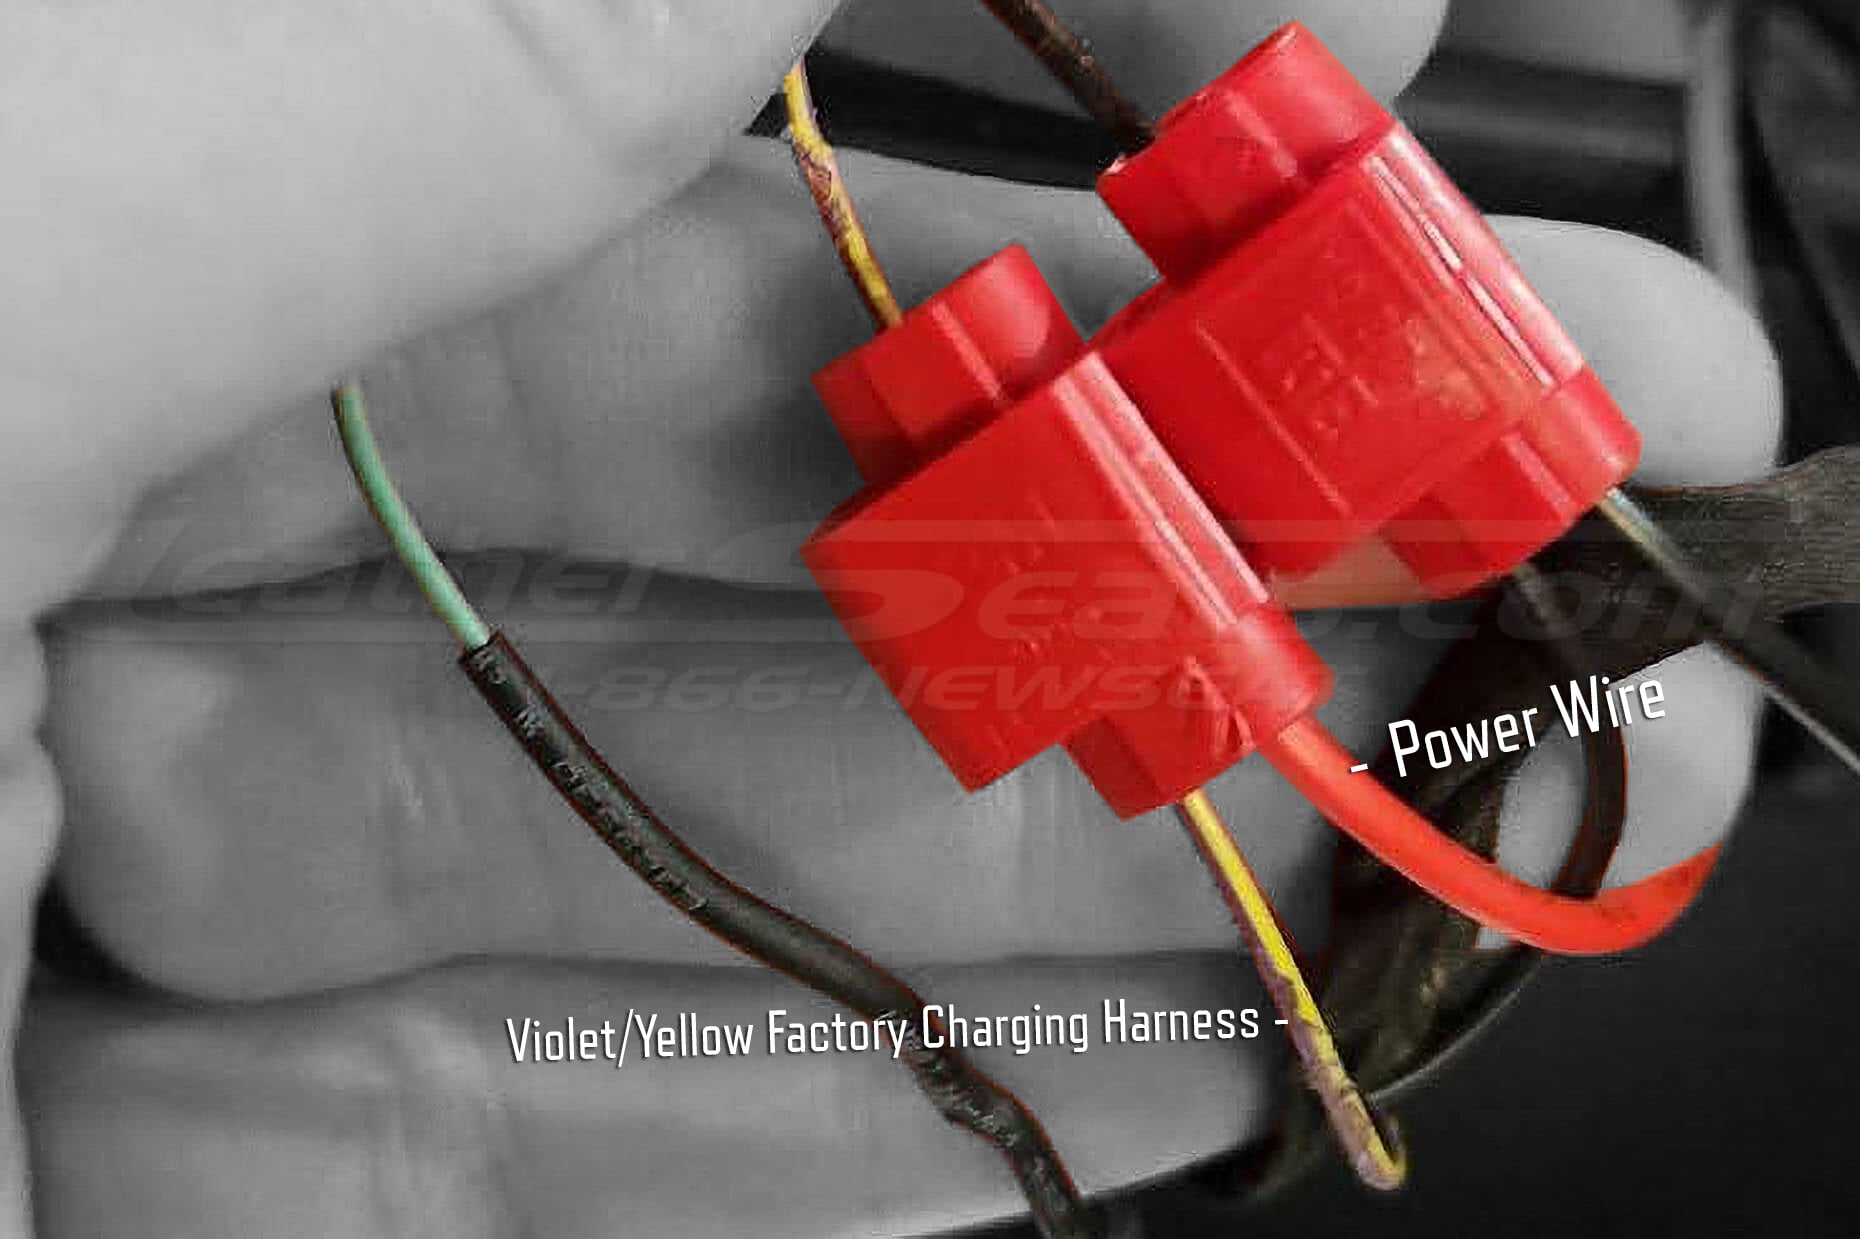
If your vehicle has factory wireless charging (hardwire method):
Tap the hardwire adapter’s Red power wire into the factory charging harness Violet/Yellow wire, and tap the adapter’s Black ground wire into the factory harness Black wire. Then connect the adapter to the charging unit. -
If your vehicle does not have factory wireless charging:
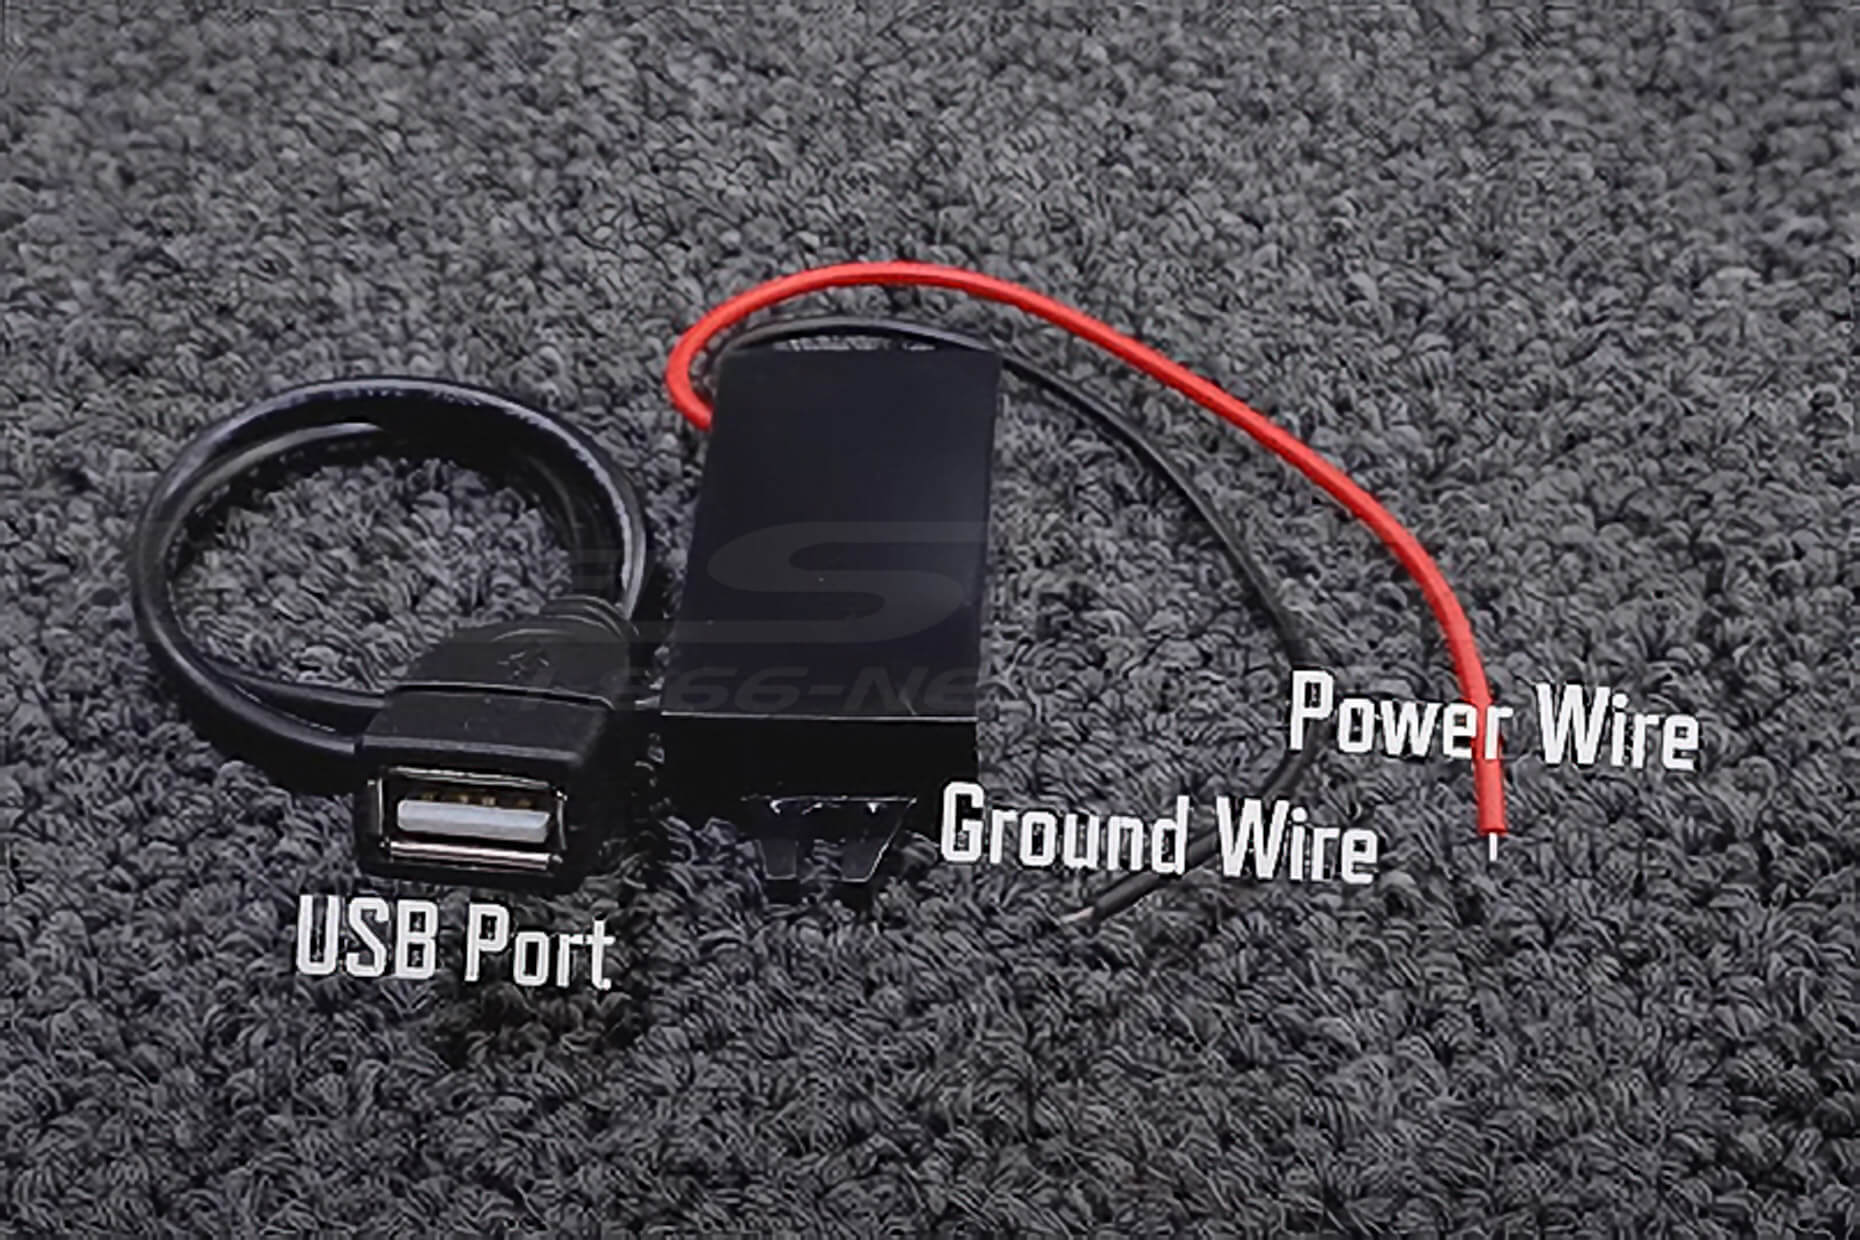
Tap into the power and ground provided by the rear passenger 12V receptacle wiring harness on the back of the console.
After making the connection, ensure all splice or connector points are fully seated and wiring is routed away from moving parts.
Step 6: Test the Wireless Charging Unit
With the vehicle’s ignition in the ON position, place a compatible device on the charging surface to confirm the unit powers on and begins charging. Verify that the charging indicator activates and that the device remains stable on the charging surface.
If the unit does not begin charging, recheck all power and ground connections before proceeding.
Step 7: Tuck and Secure Wiring
Carefully tuck any excess wiring into the cavity near the console hinge on the driver’s side. Ensure it cannot be pinched or strained during normal console operation.

Step 8: Reinstall Console Trim
Reinstall the console bezel, tray, and underside trim panel in the reverse order of removal. Press the trim panel firmly into place to engage all retaining clips and confirm the console lid opens and closes smoothly.
Installation is now complete.


