


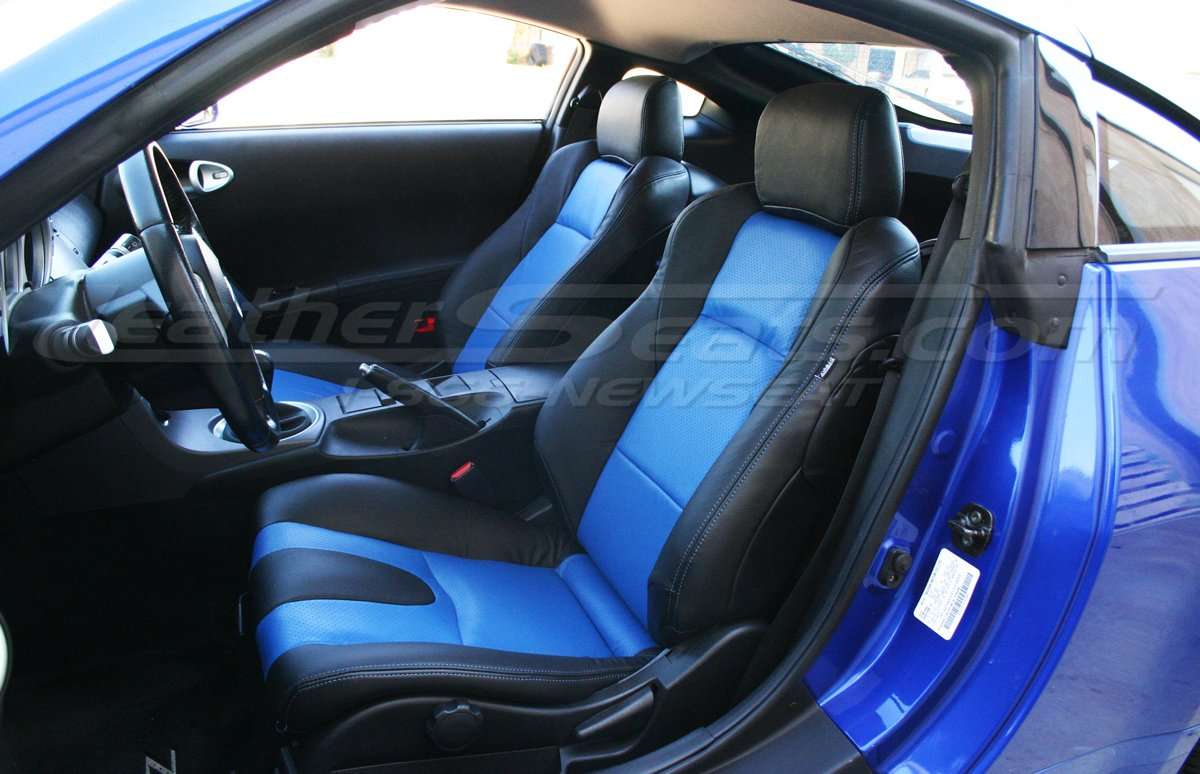
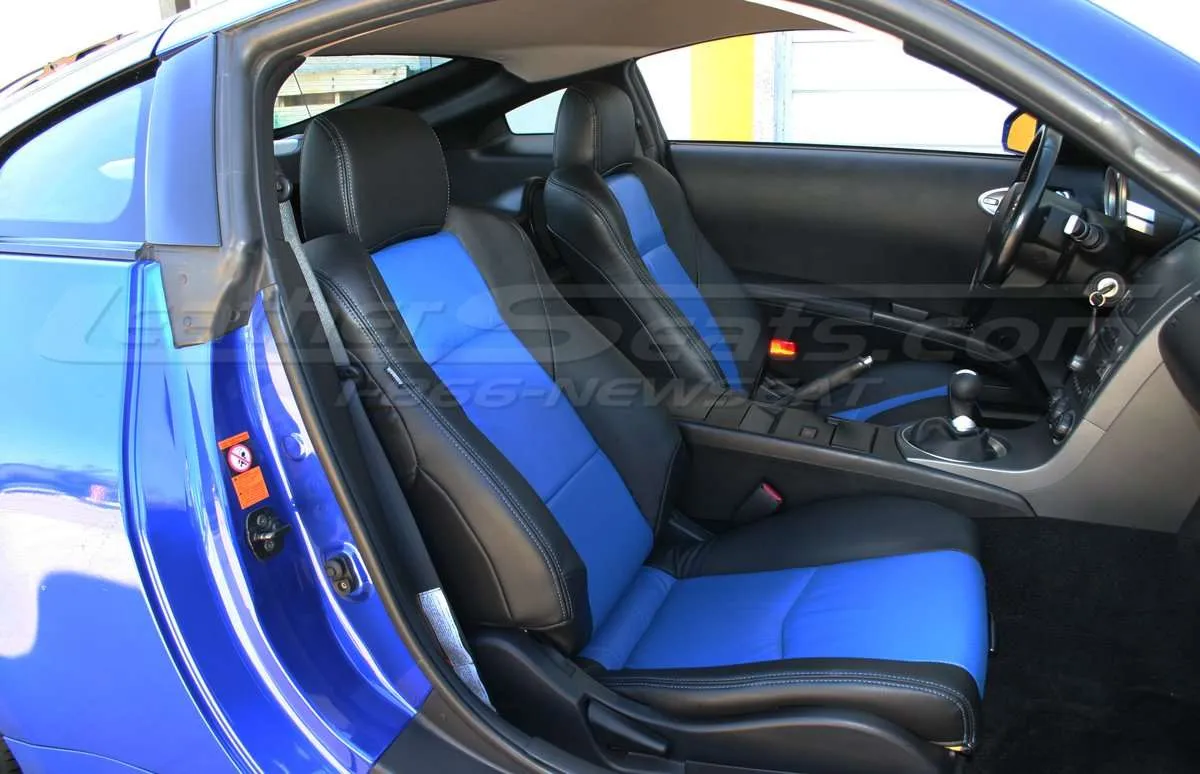
2003-2008 Nissan 350z Replacement Leather Seat Upholstery Installation Guide
It is a good idea to lay out all the tools you will need at the beginning of any installation. For the Nissan 350Z seats, you will need the following:
- 14mm Socket
- 12mm Socket
- 3/8″ Socket
- Phillips head Screwdriver
- Hog-Rings and Hog-Ring Pliers
- Tin Snips/Metal Cutters
The Nissan 350Z seats are secured by four (4) bolts. These bolts are located at the ends of the seat rails. Move the seat all the way back to reveal the front two bolts. They are covered by plastic trim pieces. Remove them using the door panel removal tool or a flathead screwdriver. After the bolts are removed, move the seat all the way forward. You will see two more bolts covered plastic trim pieces. After all four (4) bolts are removed; unplug the battery from the vehicle then tip the seat backwards to check for electrical connections. Unplug the connectors and remove the seat from the vehicle. Make sure to save all bolts, screws, and other parts for reassembly.
How to Install Nissan 350Z Leather Seat Cushion Upholstery
After the seats have been removed, flip the seat upside down, so the bottom of the cushion is facing you. There are four (4) bolts that hold the seat cushion pan to the seat frame. There are also yellow plastic clips that hold the wiring to the bottom of the seat cushion pan. Remove those bolts and the plastic clips and remove the seat cushion pan from the seat. If your Nissan 350Z has heated seats, make sure to disconnect the wiring before you remove the seat cushion. There are hog-rings around the perimeter of the seat cushion pan that hold the edge of the factory cloth/leather to the seat cushion pan. Remove these with a pair of tin snips or metal cutters.
Now fold the factory cloth/leather up around the seat pan edges and towards the center of the seat, revealing the insert seam lines. The factory inserts are attached to the foam core via hog-rings. Snip them and remove the cover. If your Nissan 350Z has heated seats, you will need to cut out the heater pad from the factory cushion. Be careful not to cut the wire that runs inside the pad, or the pad will not work. After you have removed the pad, place it on the foam before you start installing your new seat covers. The installation of the Leatherseats.com covers is the reverse of removal. Start with the inserts, and then move to the edges. After you have recovered the foam core and seat pan, set it aside and start on the backrest.
Installing Leather Seat Backrest Upholstery on a Nissan 350Z
First, remove the headrest and set it aside. On the 350Z, the headrest can be removed by holding down the release button, and pulling the headrest out. After the headrest is removed, flip the seat upside down again. You will see J-hooks and two zippers holding the covers together. Undo the J-hooks and the unzip the zippers and you will reveal the back of the seat. Remove the plastic headrest guides by locating the bottom of the plastic headrest guides and squeezing the two prongs together while pulling up on the guide. The bottom of the plastic guides are visible through the thin plastic sheet inside the top of the seat. Roll the shoulders of factory cover forward to reveal the insert seam lines. There will be hog-rings holding the insert seam lines to the foam. Remove the hog-rings starting with the edges and then remove the hog-rings on the top seam line. At this point, the factory backrest upholstery should be free and you can place your plastic headrest guides back into the seat. If your Nissan 350Z has heated seats, you will need to repeat the procedure for the heater pad in the backrest as well. To get the heater pad to stay on the seat back while installing the upholstery, hog ring the top of the pad straight to the foam at the top of the pad being careful not to hog-ring through the wire running through the pad.
The installation of the Leatherseats.com covers is the reverse of removal except that you will roll the backrest cover down the seat as seen in the video to the right. Start by rolling the backrest covers inside out and lining up the top of the cover with the foam shoulders that stand up on either side of the headrest. Roll the cover down the seat until you get to the top horizontal seam line which you will then hog-ring as well as the top of the vertical listing. Continue rolling the cover down and hog-ringing the upholstery on the vertical listings in similar locations to factory hog-rings. After you reach the bottom, close the zippers, then attach the j-hook. Reinstall the recovered seat cushion and pan assembly and reattach your plastic hardware. After you are happy with the fitment of the upholstery and you have worked out all the wrinkles, you will need to continue to the final step of cutting the required holes. You will need to cut holes for the headrest posts as well as any levers/switches that are now covered by the new leather. You should be able to see and feel the shape of the plastic headrest post guides very clearly under the leather. Take a razor blade and cut an “X” across the top of the headrest post guide that is smaller than the top of the guide. After you have cut through the material, you will stretch the leather around the guide. At this point, you are finished with the backrests and just need to move on to the headrests.
Nissan 350Z Headrest Upholstery Installation
The bottoms of the factory cloth headrests are connected with J-hooks. Simply unhook these and roll the headrest cover back to reveal the foam. However, the factory leather headrests are different. The sides and back of the leather is glued to the foam, so first you will need to take a razor blade and cut the seams along the seam lines. You can leave the bottom leather (the leather around the headrest posts), as it will not effective final fitment of the new headrest upholstery. Be careful not to remove too much of the foam while cutting away the leather, the less foam you take off the better. If you do remove too much foam, you can glue the foam back together before you install the new headrest covers. To install the Leatherseats.com leather, start with it inside out, and line up the seams to the edges of the foam. Then roll the cover down, and connect the J-hooks. If you have difficulty rolling the covers over the foam, you can wrap the foam in a plastic bag, and using a “shop vac” compress the foam to make it easier to cover the headrest. Take a look at the videos below which show (1) the installation of the headrest covers with a pneumatic headrest shrinker and (2) the technique required for removing the factory leather foam injected headrests and reupholstering them. The last step is to slide the headrest into the re-upholstered seat, and you’re finished with the front seat! Repeat this process for the other front bucket and you’re finished!
How To Reupholster Non-Foam Injected 350Z Headrests
How To Reupholster Foam Injected Headrests
Final Notes
The final step is to put everything back into the car. Make sure that you reattach all the wiring harnesses before you plug the battery back in! Be careful when removing/installing the seats from the car that you don’t scrape any plastic, metal, or the door panels with the bottom of the seat, as the seat rails are sharp and will damage any plastic, metal, or vinyl they come in contact with. After the seats are re-installed, it is a good idea to condition the leather and massage any wrinkles that are in the leather. After sitting in the sun for a few weeks, the leather will begin to shrink and will actually form itself to the foam even better, creating a wrinkle free install.
