


General Upholstery Installation Instructions
The most common question we are asked after “How is it installed?” is “Can I install it?”. Our company has a strong foundation within the do-it-yourself market, and so we always try to design our interiors to be as DIY friendly as possible. However, every vehicle’s interior and installation method is unique, and we have over 6000 different patterns. So it is virtually impossible to provide specific installation guides for all of our patterns. We have a few specific installation guides covering some of our best-selling interiors or most commonly installed interiors. These can be found under our Vehicle Specific Upholstery Installation Instructions category of LeatherSeats 101. One of the vehicle-specific installation guides is a video guide covering a Ford F-150 leather interior installation in detail. We would strongly recommend looking at that video guide to help you with useful tips and details on an average install. This written installation guide should give you an overview (and a few specifics) of the procedures required to complete a “typical” upholstery replacement. Keep in mind that these are generic instructions and do not cover all the specifics for every vehicle. These instructions should only serve as a general outline for a typical installation and cannot be strictly applied to every vehicle. There are also a few vehicles that have radically different installation methods. If you would like to find out more information concerning your specific model, please Click Here to Contact Us .
Note: Remember that removing the factory upholstery is the reverse of installation, so keep good mental notes on how everything disassembles so you will how to reassemble it. It is also good to take pictures or notes of how things appear before the install and any key disassembly steps.
How to Remove Car Seats
Most front seats are fairly easy to remove from your car. Take enough time to look at your seat and determine how they are to be removed. Be careful; most of the damage done to a car’s seats and the interior is due to the installer’s carelessness when removing the front seats. On most vehicles, four (4) bolts hold each of the front seats in. These bolts are typically found holding the four legs of the seat tracks down at the corners. Sometimes these bolts are covered by plastic trim pieces that need to be removed to expose the bolts. Once they are exposed, remove the bolts and tip the seat backward to check for electrical connections. Before unplugging the electrical connections, make sure you unplug your car’s battery. Most newer vehicles will have some electrical connections that connect to either occupancy sensors or airbag modules. If you unplug any seat sensors or air modules with the car battery still connected, the vehicle will probably throw an engine code that will have to be reset by a dealership later. So make sure to disconnect your car battery and then unplug the connectors and remove the seat from the vehicle. Take a lot of care when removing the front seats from the vehicle because the legs of the metal seat tracks can easily scratch or gouge the plastics on the door panels or other interior trim pieces. To be safe, you can wrap the feet in a shop rag or soft material so that there is a much less likely chance to cause any damage. Make sure to save all bolts, screws, and other parts for reassembly.
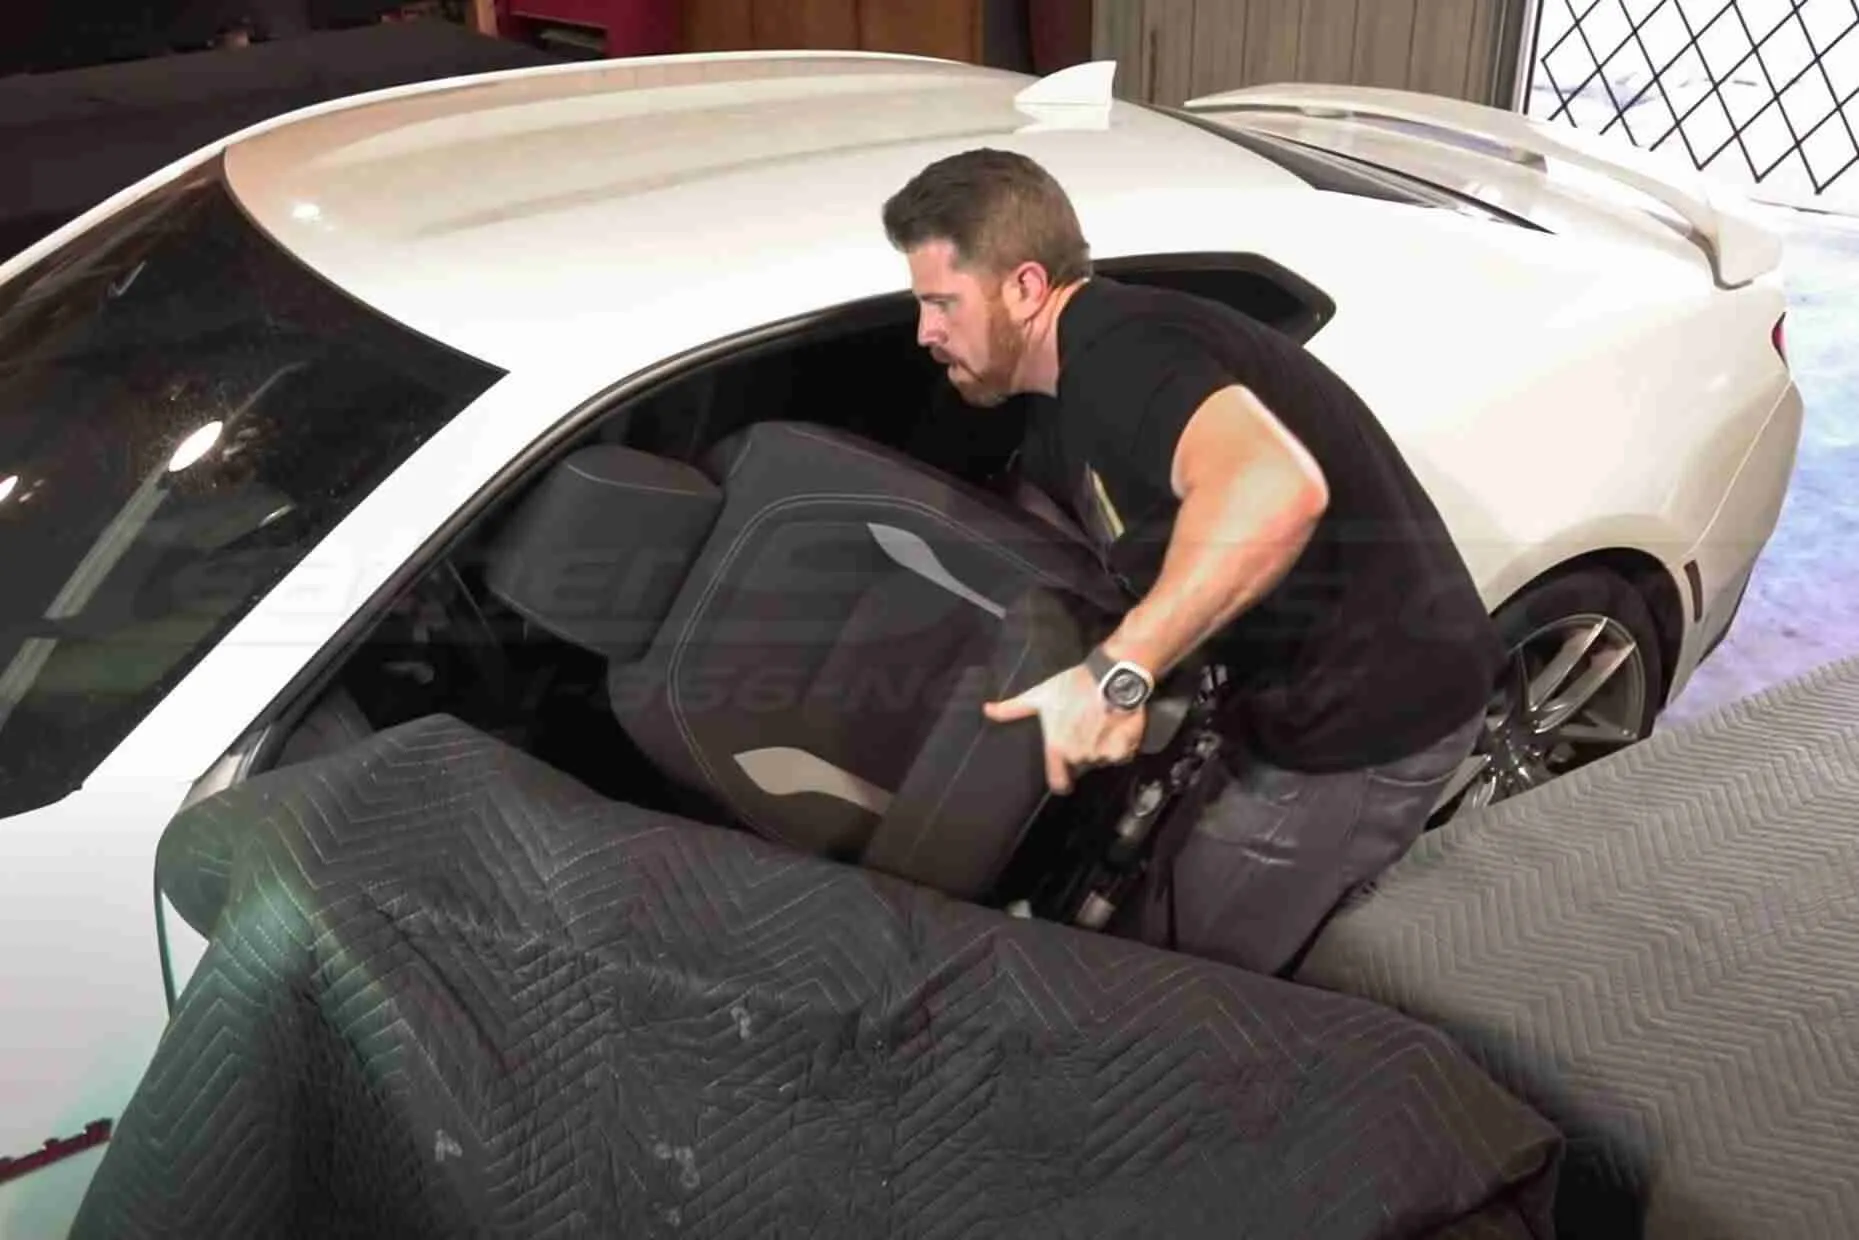
Now we move on to the back seat removal. On most vehicles, the back seat requires that you remove the cushion (bottom section) first. There are a few different methods that vehicle manufacturers use to attach the cushion. On most vehicles, there are two (2) bolts or clips that hold the front of the cushion to the floor. You can find these two bolts or clips at the edge of where the factory seat meets the carpet. Unbolt or unclip the front of the cushion, and slide the cushion from the vehicle. Once the cushion is removed, the bolts for removing the seatback are visible. There are usually four (4) bolts that hold the bottom of the seatback to the vehicle’s floor. If your vehicle has a folding armrest, there are sometimes additional bolts behind the armrest as well. After all the bolts are removed, slide the seat back upwards and remove it from the vehicle. Make sure to save all bolts, screws, and other parts for reassembly. The next step is to remove the factory leather interior or cloth interior.
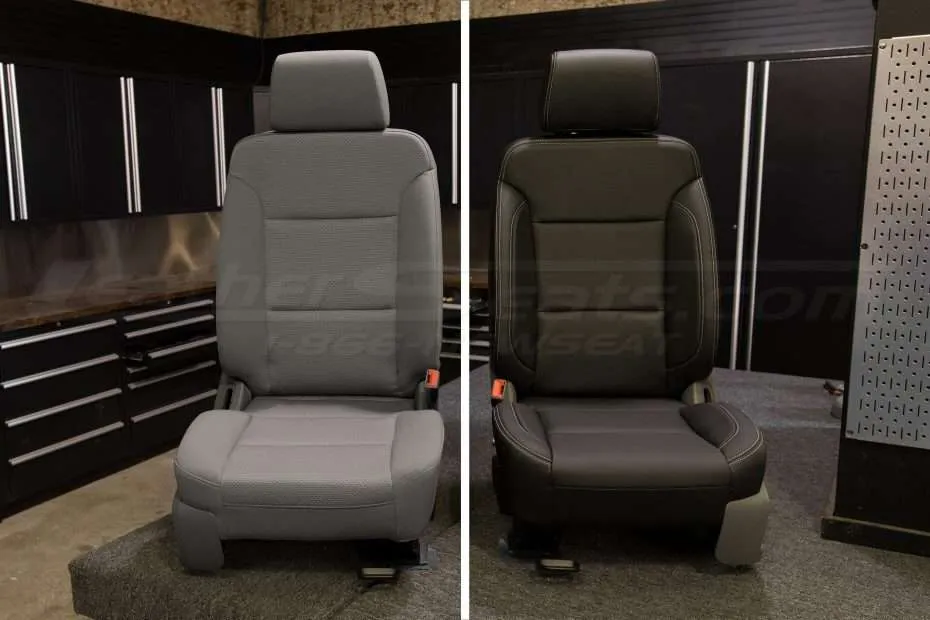
Installing Replacement Leather Seat Covers on Front Cushions
For almost all applications, the first step is to remove all of the plastic trim pieces from the seats. Most vehicles have Phillips head screws or plastic push pins that hold the plastic trim pieces to the seat. Make sure you mark which screws go where, as the screws are normally different lengths. After all the trim pieces are removed, flip the seat upside down, so the cushion’s bottom faces you. There are normally four (4) bolts that hold the seat cushion pan to the seat frame. Remove those bolts and remove the seat cushion pan from the seat. On some seats, you cannot remove the seat pan, and you will need to have to work with the seat pan still attached. There are either J-hooks (plastic channels that clip onto the frame of the seat) or hog-rings that hold the edge of the factory cloth/leather to the seat cushion pan. Remove these, and fold the factory cloth/leather up towards the center of the seat, revealing the center insert seam lines. The inserts use either hog-rings or Velcro to attach the covers to the foam core. If hog-rings are used, snip them and remove the cover. If Velcro is used, pull on the cover to separate it from the foam, being careful that the Velcro strip in the foam core doesn’t rip away from the foam. If applicable, you may need to transfer the listing wires (metal rods) from the factory cover to your new LeatherSeats.com leather interior. The installation of your LeatherSeats.com leather seat kit is the reverse of removal. Start with hog-ringing the inserts, and then move to the edges. After you have recovered the foam core and seat pan, set it aside and start on the backrest.
Front Seat Backrest Leather Upholstery Installation
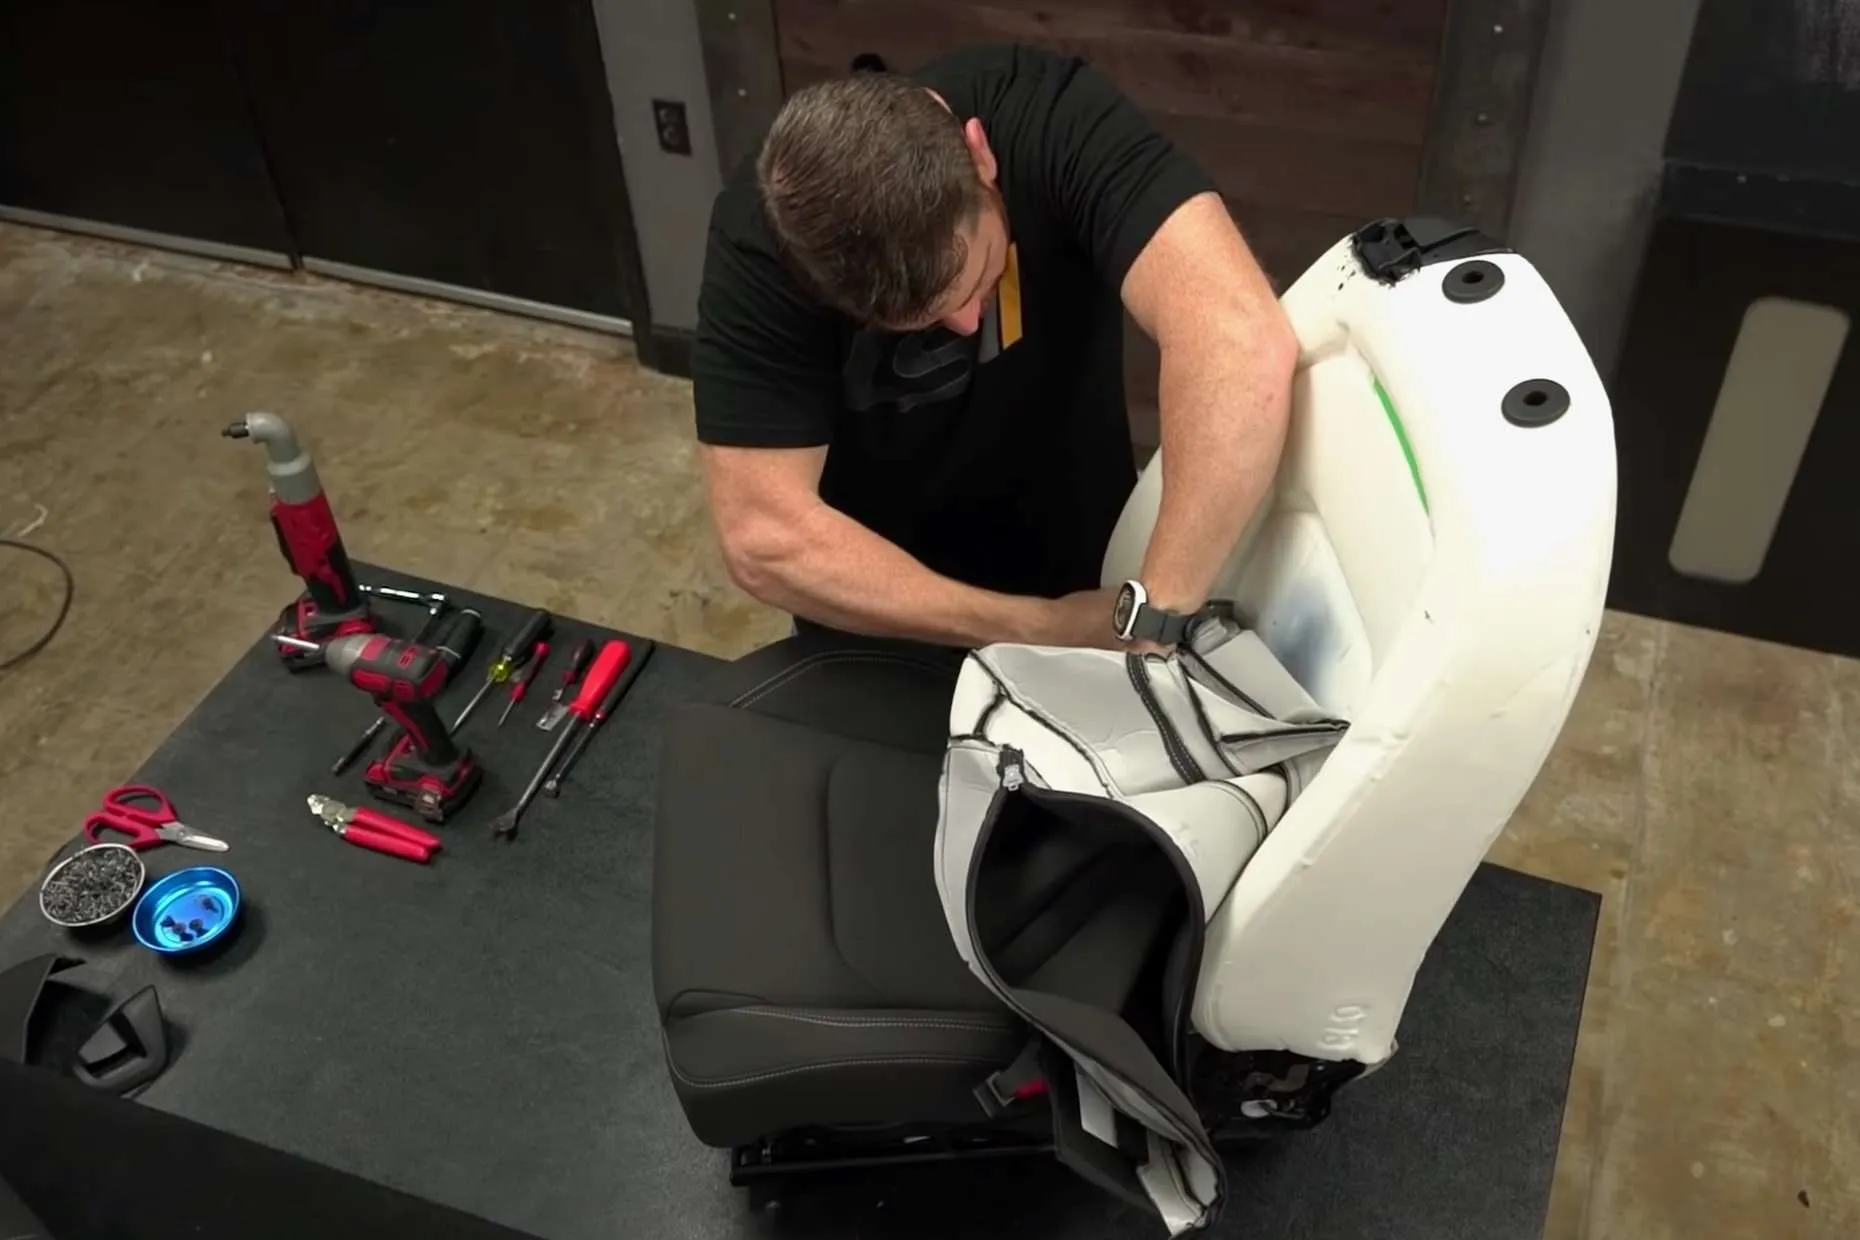
First, remove the headrest and set it aside. On most vehicles, holding down the release button and pull the headrest up will remove the headrest. However, some headrests have small pinholes on the sides of the headrest guides, which house the release buttons that must be pressed by sliding a small thin wire or pick tool into the pinholes and pulling the headrest up. After the headrest is removed, flip the seat upside down again. If your seat has soft cloth/vinyl backs, you will see J-hooks, hog-rings, or a zipper holding the factory covers together. Undo the J-hooks, snip the hog-rings, or unzip the cover and start to roll the cover up. There will be hog-rings or Velcro holding the insert seam lines to the foam. Remove the hog-rings as you roll the cover up over the seat. If your seat has a hardback, a series of screws along the bottom hold the bottom of the hardback to the seat. Unscrew these, and then pull open the hardback slightly to determine if the hardback needs to be slid up or down to be removed. Slide the hardback in the appropriate direction, and remove it. Now, you should be able to see the attachment points holding the factory seat cover to the frame. Undo these attachments, and pull the cover up and over the foam seat back core.
The cover should be loose, so if it feels like it is caught on something, you probably missed an attachment somewhere. When you get to the headrest posts, work the covers around the posts one at a time until the covers are removed. You may need to trim the factory covers slightly, making it easier to slip the top of the headrest post through the hole in the cover. The installation of your LeatherSeats.com leather seat covers is the reverse of removal. Start with the cover inside out, and align the seams with the edges of the foam. Start to roll the cover down, and attach the hog-rings as you come to them. After you reach the bottom, close the zipper, or reattach your hardback. Reinstall the recovered seat cushion and pan assembly and reattach your plastic hardware. You will need to cut holes for the headrest posts and any levers/switches that are now covered by the new leather interior kit. To do this, cut small slits in the leather seat and work the leather around the headrest posts and any levers/switches that need to be exposed. Tuck the excess leather underneath the headrest posts/levers/switches.
How to Install Headrest Upholstery
The headrests are the easiest part to understand how to install. The headrest cover is typically held in place and connected with J-hooks or zippers located between the headrest posts. Unhook these and roll the headrest cover back to reveal the foam. However, it is becoming more common for headrest covers to be foam injected, which means that the cover gets stuck/glued to the foam and cannot be removed. Headrest covers that cannot be removed are designed to be installed over the top of the existing cover. To install the LeatherSeats.com leather headrests, start with it inside out, and line up the seams to the edges of the foam. Then roll the cover down, and connect the J-hooks. If you have difficulty rolling the covers over the foam, you can slide the factory foam headrest in a plastic garbage bag and then put a “shop vac” or regular vacuum cleaner nozzle inside the bag against the foam. Turn on the vacuum, and you will compress the foam, making it MUCH easier to cover the headrest. Slide the headrest into the re-upholstered seat, and you’re finished with the front leather seats!
Rear Seat Cushion Leather Upholstery Installation
The backseat on most vehicles is very easy. Unlike the front buckets, normally, the only hardware to remove is the center armrest, and a few clips that hold the lever tore lease the seatback. The cushion is the easier of the two sections in the backseat. Start with the cushion upside down, and work your way around the cushion sniping hog-rings or unhooking the j-hooks. After you have removed all the attachments around the perimeter of the cushion, fold the cover up over the foam of the cushion to reveal the inserts. Snip the hog-rings for the inserts, and remove the cover. Installation is the reverse of removal. It is best to start with your LeatherSeats.com leather seat cover inside out and hog-ring the inserts first. When you get to the edges, fold the cover over the foam. Then, hog-ring the perimeter of the cushion where the factory attachment points are, and you’re finished!
Rear Seat Backrest Leather Upholstery Installation
If applicable, remove the center armrest from the backrest. A few bolts on the backside of the foam normally hold it on. Remember to note how the hardware fits together. Some vehicles have a certain order in which washers, bearings, shims, etc., go together to make the armrest fold. After the armrest is removed, remove the factory cloth/leather from the armrest. It is very similar to the headrests and often easier than the headrests. There should be J-hooks or a zipper on the back of the armrest. Un-hook them and slide the cover off. To install the LeatherSeats.com armrest cover, start with the cover inside out, line up the seams at the tip of the armrest, and roll the cover over. Hook the new J-hooks together, and set them aside. Now, remove the cover on the backrest. Around the perimeter of the backside of the seat, some hog-rings attach the factory cover to the foam. Snip the hog-rings and then roll the cover off the foam to reveal the insert hog-rings. Snip these hog rings, and the cover should fall off of the foam. If applicable, swap the factory listing wires to your LeatherSeats.com leather seat cover. Installation is the reverse of removal. Start with the cover inside out and hog-ring the inserts first. Then roll the cover over the corners and hog-ring the perimeter in the factory locations. Re-install the armrest, and you’re finished!
Installing Door Panel Inserts (Leather & Vinyl)
Although not every kit comes with material for the door inserts or armrests, this is undoubtedly the most difficult part of any install. The door panels we send are normally vinyl pieces that match to the leather kit you ordered. The first step is to remove the whole door panel from the door. Every vehicle’s door panels are attached differently, so you might want to look on the web for more information concerning your specific application. You can also give us a call, and we might be able to help with some of the models we are familiar with. Once you have the door panels, take them to your clean work area to begin the installation. We HIGHLY RECOMMEND leaving the factory cloth ON THE DOOR PANEL. It will make the installation go much easier and will make the finished product look much more professional. There are some cases where the factory cloth will have to be removed because there isn’t enough room to tuck the new door insert, but it is pretty rare, so always keep the cloth on the insert section to start.
Lay the door panel on a flat table and find the correct door insert. Lay the LeatherSeats.com door insert over the cloth insert and line it up. Take your stuffing tool and begin to push the insert down into the crevice all the way around the cloth insert. This will give you an idea of how much of the leather insert needs to be trimmed off. Trim the new insert slowly and conservatively, so you do not end up cutting the insert too short. Now that the insert is trimmed do a final dry stuffing of its edges to see if they fold down into the crevice neatly and that the edge disappears. Remove the door insert piece after your final dry fitting. Having finished the trimming of the insert, tape off the door insert to minimize the overspray/mess that will be made when applying the glue. Shake the spray-can of spray adhesive and apply a coat of glue to both the bottom of the insert and the top of the cloth insert. Let it tack (dry) up for about 4 minutes and apply a second coat in an opposite spray pattern if needed. If you do use a second coat, then let it tack up for about 8 minutes. These times are average and will change depending on the weather. Cold or humid weather might increase the curing time, whereas hot or dry weather could decrease the curing time.
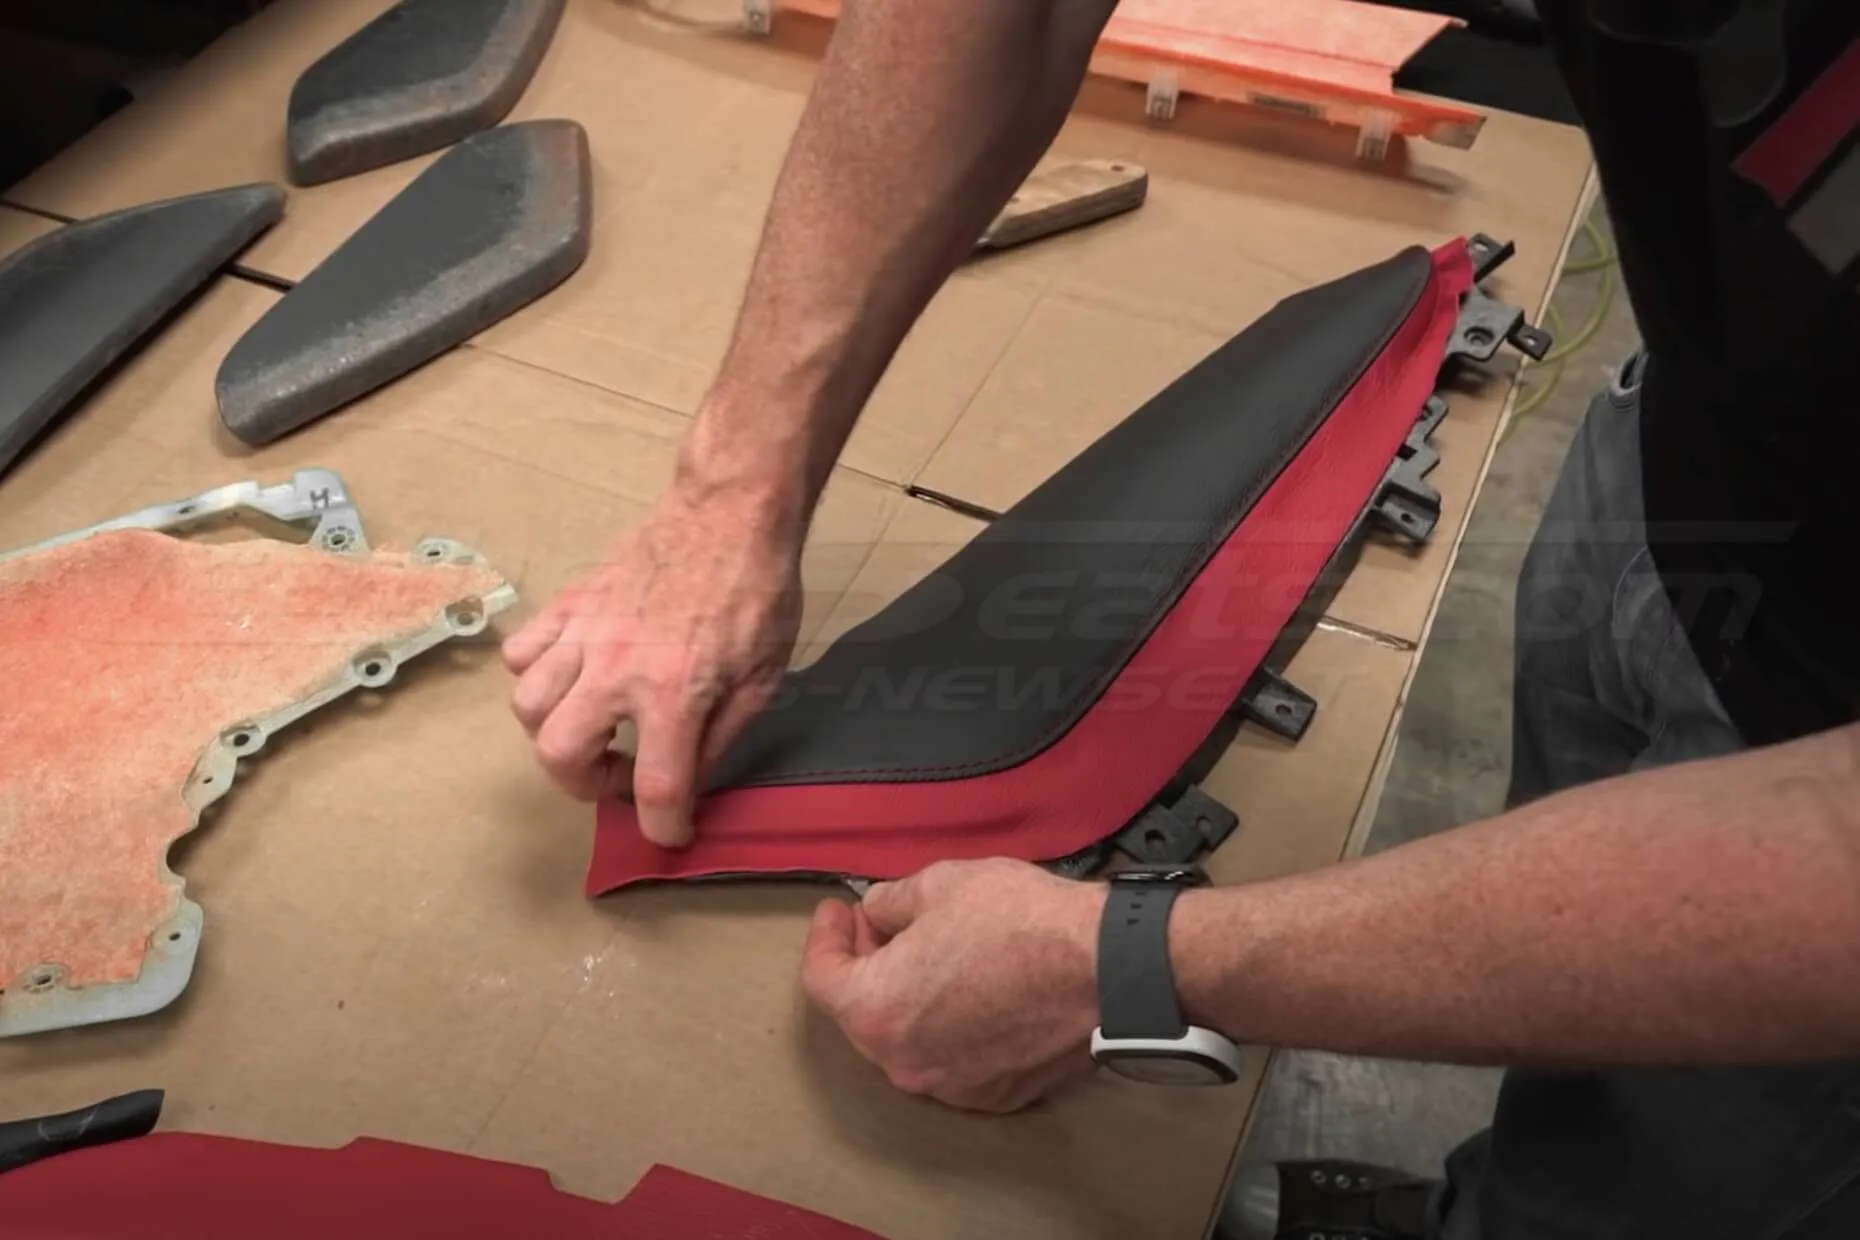
At this point, you should be ready to install the door inserts. Be sure to place the insert squarely on the cloth insert to minimized wrinkling. Quickly begin to stuff the edges of the leather insert into the crevice so that no edges show. Finally, let the insert dry for at least 2 hours before installing the door panels in the car to avoid fumes. While waiting for the insert to dry, remove the tape used to minimize over-spray and begin to clean the vinyl insert and door panel vinyl/plastics with leather cleaner and a clean rag.
Leather Seat Installation Tips and Final Steps
The final step is to put everything back into the car. It is generally easier to install the rear seat first. Be careful when installing the front seats that you don’t scrape any plastic or the door panels with the bottom of the seat, as the seat rails are sharp and will damage any plastic or vinyl they come in contact with. After the seats are re-installed, it is a good idea to condition the leather and massage any wrinkles in the leather. After sitting in the sun for a few days, the new leather interior will actually form itself to the foam, creating a wrinkle-free install. We suggest using our Sanctum Leather Cleaner & Conditioner once every few weeks to keep your leather looking new. This will keep any chemicals off the top coat of the leather and keep all the moisture locked into the leather for a soft and supple leather year after year.
